Showing posts with label Pin Cushions. Show all posts

Sunday, April 17, 2016

Another Hexie Pin Cushion!


It's a beautiful spring day and I should be outside tackling my yard work to-do list that is a mile long... 


Instead, I couldn't resist stitching one more hexie pin cushion!


This time I added some hand quilting stitches using some #12 perle cotton and #12 Aurifil thread.  
Even though the Aurifil thread is more expensive, I discovered that I like stitching with it so much better than the perle cotton.


Here's a view of the back!


Of course, a sweet vintage button from my collection adds the final touch!


Note:  You can get 5 or 10 gram balls of Presencia perle cotton from Colonial Needle Co.  They have super fast shipping.  It's really worth investing in a color chart if you are looking for specific colors for your project.  
I ordered the Aurifil 12 weight spools from Hawthorne Threads.  Again, an Aurifil thread chart is worth its weight in gold, and the colors apply to all thread weights, including their 50 wt which I use for machine quilting.

Have a Happy Hexie Day!


Tuesday, June 9, 2015

Embroidery Love


I stitched these lovely embroidery squares a few years ago.  Aren't they dear?!


 These sweet designs by Rebekah Shucksmith were featured in the June 2011 issue of American Patchwork and Quilting magazine.  I love, love, love embroidery, but as an adult, hadn't come across any designs I liked until I saw these.  I immediately stitched them up, but then didn't know quite what to do with them.  They were intended to be sachets, but I hated to tuck such lovely stitching away in a drawer.


I revisited them today, wondering if I should stitch some more squares and incorporate them into a quilt at some point.  I may just do that, but in the meantime, I thought I'd go ahead and at least turn one of them into a pin cushion.


Some piping and vintage buttons complete the look.


Can't wait to stitch some more - I thoroughly enjoyed ever single moment of working on these.  I felt like a young girl again, stitching away!

Monday, June 8, 2015

A Pin Cushion Bites the Dust


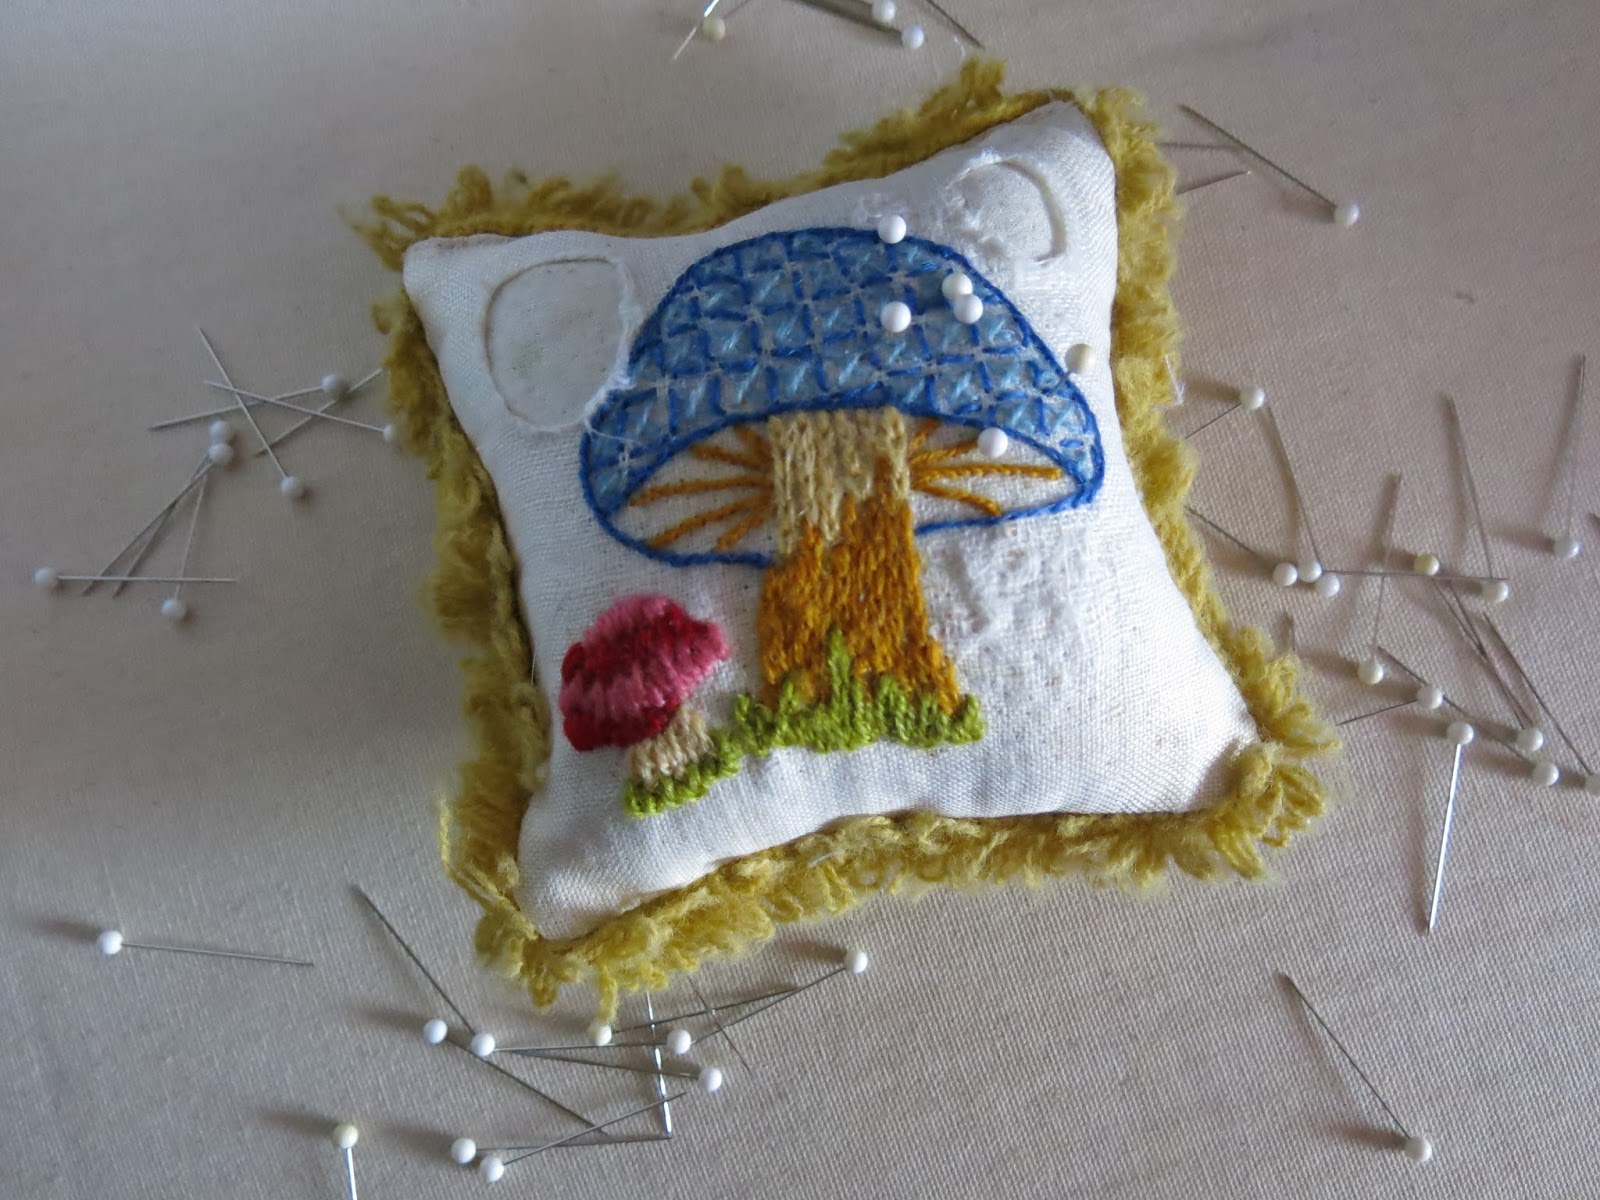
I decided it was time to finally retire my beloved pincushion....


I stitched this pincushion back in the 70's when I was in middle school (remember when mushrooms were all the rage?!).  My mom gave me the crewel embroidery kit as a gift, and she helped me add the fringe and stuff it with old pantyhose (back when you did just things out of necessity, not because it was trendy to repurpose!).

I was recently remembering how good my mom was about making sure that I always had a needlework project to work on, whether it was a cross stitch sampler, or pillowcases, dresser scarves or tea towels to embroider.  Even though money was tight, I was always allowed to order a needlework kit from the Lee Wards catalog.


I stitched a few new pin cushions out of  scraps from the Roman Shade in my sewing room.
I like how they turned out!


But, I think I'm going to still hang on to my old pin cushion.  I may find a glass jar with a lid to house to store it and keep it for posterity's sake!

Friday, August 1, 2014

Flower Bed Pin Cushion with Numbered Flower Q-Pins


I'd been wanting some of those Numbered Q-Pins, but couldn't swallow the price, so I got the bright idea to make my own version!


My first attempt was take some polymer clay and form heads on glass pins for marking the numbers.


But, they were clunky, and I just didn't like the look of them - they certainly didn't enhance the beauty of my  special pin cushion!


Then, I realized I could simply take a fine-tip Sharpie marker and write the numbers on  Flat Flower Head Pins.  (Wish I had thought of that simple solution first!)  The surface has just enough texture that the marker doesn't rub off.  Hooray!  So, now I needed the perfect pin cushion for holding the pins in numerical order.


I stitched this cushion of out my teeniest 30's scraps.  (Stitching this hexie pin cushion gave me the courage to create a version perfectly suited for my pins.)  The blocks finish at 1" square, so the cushion measures 2 x 7" and is 1" high.  The 14 blocks easily hold 2 pins each, so I marked numbers on 28 pins.  I can't imagine doing a quilt with more than 28 columns or rows, so these should be more than adequate.


Here's a view of the back.


Don't the pins look happy in their very own flower bed?  :)


The buttons help the cushion keep its shape and makes it nice and firm.  I used walnut shells for the filling again - love using them in pin cushions; they add the perfect weight!


And, I love that both sets of buttons came from my vintage button collection.
:)


PS - Those Numbered Q-Pins would have been a bargain compared to everything I invested in this cushion and pins, but I think the final results are worth it!  
Believe me, there were a number of other attempts before I arrived at this version, including purchases of glue, beads, etc., etc.  My original intent was to recreate these pins (aren't they great!), but I couldn't find any numbered beads at A.C. Moore or Michaels or even on line (really?!!).  So, I tried making my own number beads, but the numbers kept rubbing off the beads I was using.  And, it was a mess trying to glue the bead on the pin without getting glue all over the pin.  

So, can you understand why my very own Flower Bed Pin Cushion and Numbered Flower Q-Pins make me quite happy?!


Friday, May 16, 2014

Hexie Pin Cushion


I wasn't feeling the greatest today, but had enough energy and brain power to make this Pretty By Hand-inspired pin cushion.  (Happiness is being too sick to work but not too sick to stitch hexies!)


It is a bit crazy to stitch such teeny tiny hexies together, but as any hexie addict knows, it's so satisfying!  And, Kristyne is the champion for anything handmade that's tiny!


I used this PDF Hexagon Generator to print off my 1/2" hexagon template onto card stock.  It's a handy site - you can print any size hexagon you wish simply by changing the hexagon size.  Or, you can always purchase precut paper pieces from Paper Pieces.


Stitching the sides was a bit fiddly (not sure how Kristyne managed to do such a perfect job on hers...), but it was worth the effort.  The side band is 1" wide (plus seam allowances).


The linen-looking fabric is a piece of yardage I found in my Great Aunt's attic when we cleaned out her house over 20 years ago.  It looks like it could have been used for interlining in suiting??  It definitely was used in some kind of garment construction based one the shapes that were cut out of it; my guess is that it was used in the garment factory where my Great Aunt worked.  It's a bit heavy, especially for such tiny hexies, but I really like the vintage feel it gives to the cushion.  (This yardage has served a number of purposes for me over the years, including a Christmas tree skirt and a backdrop for photos.  It would also make a great table runner on a long table for an outdoor dinner!)   :)  I'll probably use Essex Linen or Essex Yarn-Dyed Linen in the future for a similar project, but I didn't have any on hand in the right shade.

After stitching everything together, I filled it with ground walnut shells (same thing I used for these pin cushions) using a funnel, then whipstitched the edges together.   (I did however, at Kristyne's suggestion, pick up a 10-lb. bag of walnut shells in the reptile aisle at the pet store for way cheaper to have on hand for future projects.)  I really like the weight and shape the walnut shells provide. 

The yellow buttons are from my collection of vintage buttons I've picked up at the thrift shop over the years.  :)


And, as much as I HATE using anything polyester, I am a Superior Threads "The Bottom Line" thread convert when it comes to English Paper Piecing.  It's strong enough to withstand the abrasive edges of the EPP templates, it doesn't tangle, and it's so fine that my stitches almost disappear into the fabric.

Thanks, Kristyne, for your inspiration!

Thursday, January 30, 2014

Armrest Pincushion Organizer


I've been wanting to get a armrest pincushion in place for my favorite chair, replacing...


...this!  Not a very good use of an expensive chair,


even though it worked perfectly, except for the fact that I was always losing my scissors!


I love it!  I never knew that not losing your scissors while hand stitching could be so enjoyable!
I based my version on this inspiration via Pinterest and this tutorial.  


Finished size:  5 1/2 x 16"
Pockets are 7" tall
Machine quilted rows are 1" apart.
Pockets divisions are stitched in the machine quilting channels.
I filled the pincushion section with ground black walnut shells, just as I did with these needle cushions.

To make one perfectly suited for your favorite chair, simply drape a piece of fabric over the armrest to get an idea of what size you will need.


Needle Cushions


I'm such a sucker for these vintage tart pans; I'm always picking them up at the thrift shop.  A friend recently asked, "What are you going to do with them??"  I wasn't sure, but I thought surely something related to sewing or quilting would be their destination.  And it was....


They became the base for these little pin cushions!


I'm always losing my needles in the middle of my tomato pin cushions, 
so I purposely made these more shallow than your typical pin cushion.


I filled them with ground black walnut shells.  Really, really like the weight the walnut shells add, helping to keep these little cushions in their place.


I picked up a bag of ground walnut shells at a quilt show last year, 


but did wonder why the shells are almost as expensive as the walnuts themselves!!
However, it does feel good to use a natural product that would have gone to waste otherwise.

:)