Friday, February 7, 2014

Liberty-Inspired Draw String Bag


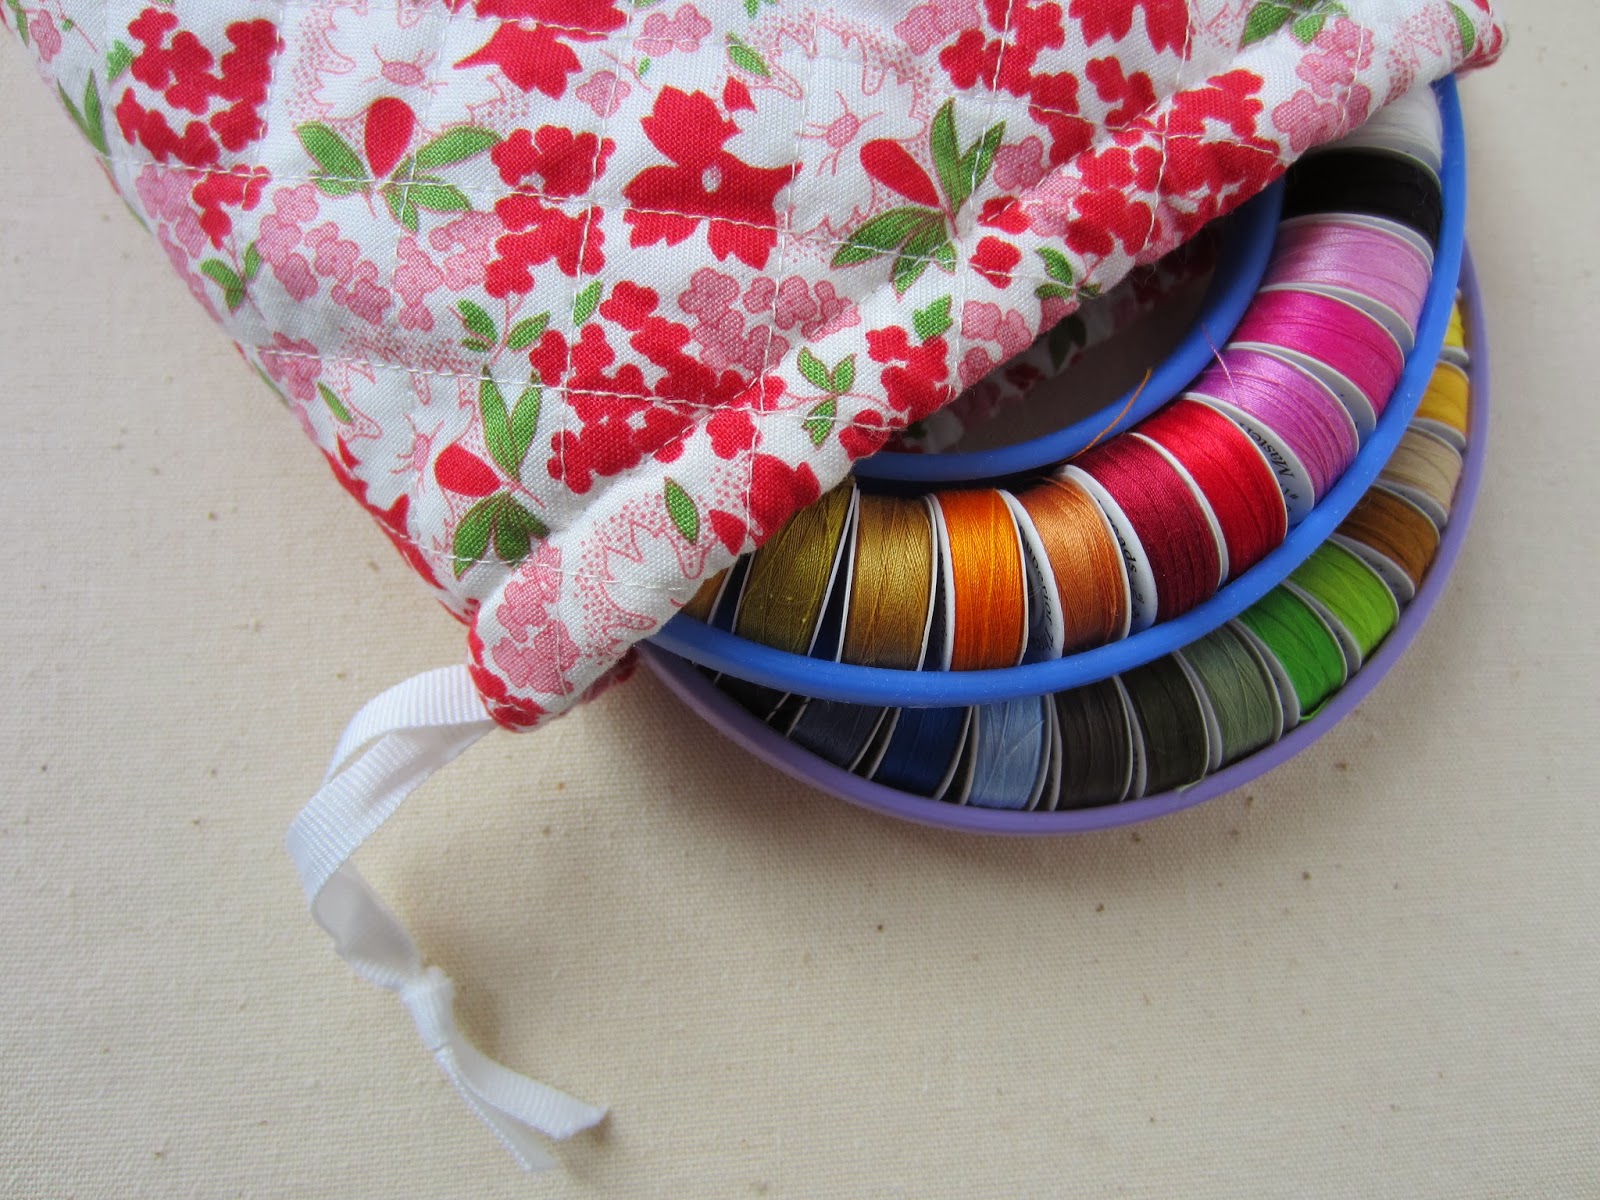
I stitched up this little drawstring bag today.


It was inspired by this dear little Liberty bag that my friend Denise had brought back from London for me years ago; I believe it may have contained a sewing kit at the time, but I can't remember for sure.


I've always loved it, especially the fabric....  And, this was long before I knew anything about the wonderful fabric Liberty is known for.  The bag was too special to use for just anything, so I simply kept it as a sweet reminder of Denise's kindness and our shared love of fabric.


Then, yesterday one of these bobbin holders arrived in the mail.  I quickly filled it with bobbins of my Aurafil thread collection (I still don't have very many colors yet!) so that it's handy to grab for applique or paper piecing.  Then, I discovered that the sweet Liberty bag that has been waiting for a purpose all these years is the perfect size for storing the bobbin holder.


But, that left my two "Frosted Donuts" that I had purchased before Christmas in need of a bag to protect them as well!  So, I stitched up a Liberty-inspired bag for them.


I machine quilted a diagonal grid of lines 3/4" apart with my walking foot, just like the Liberty bag.  For the batting, I used some scraps of Warm & White batting that were left over from covering my design wall.


Instead of this elaborate bottom on the base of the Liberty bag, 


I stitched a very simple boxed bottom (not sure if that's what you call it....).


I used some grosgrain ribbon I had on had for the drawstring.  I should have made the casing a bit wider, but it will do for now.


I used a silky lining fabric for the inside lining, just like the Liberty bag, so that the bobbin holders will easily slide in and out of the bag.


Don't these threads look happy in their new home?

:)


Thursday, February 6, 2014

Portable Design Wall


I've been wanting to add a design wall to my quilt studio after reading about them here, here and here.  I had my quilt room painted last week (love, love, LOVE the color - more on that later!), so it motivated me to clean up, organize and make the space a bit more usable.  I had been using the flannel back of a vinyl tablecloth as a design wall (I had posted about it here), but it turned out not to be as usable as I had hoped because 1) I had a framed picture on the wall behind it (too big to take down and then rehang easily), and it prevented the surface from being flat enough.  As a result, I would mount one block, then a bunch of other blocks would fall off. Not too helpful!  And, 2)  I was tired of climbing up on a step ladder and straining to reach to hang or remove the tablecloth.  So, an improvement was overdue!

 I decided to do a portable version of a design wall instead of mounting a permanent one on the wall because I'm too in love with the new paint color on the walls
(Benjamin Moore, Seabrook #750) to cover it up with a huge design wall.

So, here's how I went about it:


First, since I decided I wanted to make a portable version, I needed something lightweight and sturdy.  So, I chose one-inch thick insulation board.  The insulation board is light weight, and the 1" thickness gives it the sturdiness needed.  I purchased two 4x8' sheets of one-inch insulation board from my local lumber yard.  (I'm so grateful to have such a helpful business just a few miles from my home - I often feel like they are my personal "husband for hire"!)  They were kind enough to cut the boards down to my dimensions (not every lumber yard will do that for you).  I had them cut into two-foot widths; that way I could get them home and manage them easily as well as store them in my quilt studio when I want to tuck them away.  I also had them trim them to 80 high"; that way I can easily move them around the room without knocking into the light fixtures.  And, 80" is about as high as I can reach without standing on a step stool anyway.

There's a myriad of choices when it comes to insulation board, enough to make your brain hurt!  That's why I went to my local lumber yard where there were fewer options.  You don't need a high "R-value" (the R-value rates the insulation properties of the board).  You simply want something sturdy, especially if you want your design wall to be portable vs. mounting on the wall.  I simply purchased the cheapest one-inch board they had, and also selected a neutral color vs. blue; that way the color would be less likely to show through the batting.


I chose to cover my boards with Warm & White 100% cotton batting.  You can use a flannel sheet, but I liked the thickness and nappiness of the batting.  If you go with batting, be sure to choose something sturdy as you need to be able to stretch the batting tightly over the board with out distorting it.  I like the look of the white batting vs. natural.


I cut the batting four inches bigger all the way around; that gave me plenty of  excess to stretch over the one-inch thickness and enough to grab hold of as I stapled it.  I simply stretched and stapled the batting the whole way around with a light weight staple gun and 1/4" staples.  Be sure to wrap the batting around the plain side of the board and keep the printed side on the back - otherwise you'll have some interesting graphics showing through the batting on the front of your design wall!  This particular insulation board was very easy to staple into and the staples held very nicely.  I debated about glueing the batting onto the front of the board because I don't want the batting to sag over time, but I figure I can easily remove the staples and re-stretch it if need be down the road.  Actually, this particular insulation board has a bit of a rough surface and seemed to grip the batting a bit, so I don't think that will be an issue.  I had planned to duct tape the edges down to finish it off with white duct tape, but I was afraid to do that just in case I need to re-staple the batting at a later date.


You'll want to make sure your corners are nice and neat, especially if you plan to permanently mount it on the wall.  I found a double fold at the corners worked best, 


being careful to pull the batting up and away from the corner.


I love the versatility of this version of a design wall!  I can prop three (or all four!) boards against the wall and hang a finished quilt top or quilt blocks,


or just two for a smaller project.


The boards are narrow enough to tuck one behind a door,


and easily store behind my huge hutch for out-of-the way storage if need be.

I have another project in mind for the 16" insulation board scraps.  But for now, the next project on the list is a "Big Board" pressing board!

Wednesday, February 5, 2014

Pressing Boards


I was happy to get these pressing boards completed today!  I've been wanting to make some ever since reading about them here.  


I had been using this table top ironing board set up next to my sewing machine, but it had seen better days, and the shape wasn't ideal for quilting.

There was just enough usable canvas from the end of my old ironing board cover for covering these two boards, 10x13" and 14x19" (the same sizes as recommended in the tutorial).  My local lumber yard was kind enough to give me some lumber scraps for free; they even cut them cut them to size for me!  (I'm not even sure what kind of board it is - I hated to ask questions or sound ungrateful when it was free!)  

I had planned to use sound board as recommended in the tutorial, but my local lumber yard didn't carry it, and it only came in 4x8' sheets at Home Depot, way more than I needed for this project!  


I basically followed the directions on the blog I referenced above, only I used 2 layers of  Warm and Natural batting instead of one.  I rounded the corners with #60 grit sandpaper so that the corners won't wear out too quickly.


Here's a view of the back.  I figure I can easily recover them from time to time, or cover them with a decorator fabric when I feel inspired.  I went ahead and made both sizes; I figured it would be nice to have a small one to take along to my quilt guild's all-day sew; I plan to use the larger one on top of my "big board" pressing surface (when I get it done!) - that way the pressing board will get the bulk of the wear and tear, and I can recover it easily vs. an entire big board.

Time for a New Ironing Board Cover!


Time for a new ironing board cover, wouldn't you say!  (I always wonder if the status of my nasty ironing board cover will erode my sewing customers' confidence in my sewing skills!)  I had purchased the fabric several years ago for a new cover, but never got around to it until today.  Actually, the real motivation was because I wanted to use the scraps to make some pressing boards for my quilt studio.  I was just thankful to have something to motivate me!

You would think that you could easily purchase a plain 100% cotton canvas ironing board cover, but they're  simply not out there!


Here's the new cover.  Aaaahhhh, so much better.  


I simply used the old cover as a guide, but cut it a bit larger to make a casing for a drawstring.  The previous cover had elastic in the casing, but the elastic always conks out at some point and then you're left with a sloppy cover (although, who am I to talk?!).  I used some grosgrain ribbon I had on hand for the drawstring; it worked great.


I would have loved to use this Annie Selke designer fabric to make the cover, but it was so insanely expensive (I had to special order it from Jo-Ann's when I made the curtains), so I hated to use it for an ironing board cover that would just get ruined in no time.


So, instead I plan to stitch a simple cover out of the Annie Selke fabric that I can lay on top of the board, then simply fold back when I want to use my iron.

Feels good to have that project off my to-do list!

Actually, I love that Annie Selke fabric so much that I plan to make a Roman shade for my master bath as well!

Tuesday, February 4, 2014

Monday, February 3, 2014

String Quilt Photo Finish


Two of my neighbors were great sports about helping me get some outdoor photos of my string quilt today.


First, next-door neighbor Andrew used his work break to help me out with these photos.


Then, the sun came out.  My neighbor Alisha had stopped by, so I nabbed her for another try. 


But, it was a bit too windy by that time!


However, the wind...


.... allowed us to get a picture of the snowman in the background!

I'll post more details on this particular quilt later!

Sunday, February 2, 2014

Featherlite Love


This was my first chance to view a Featherlite in person.  Oh my, how I would love to have one!  It was part of an exhibit entitled "A Stitch in Time", curated by the Hummelstown Historical Society.

So dear....