Showing posts with label Vintage Quilts. Show all posts

Wednesday, April 26, 2017

Cleaning Vintage Quilts


Every now and then I get a question on how to wash an antique or vintage quilt.  It makes people nervous, but I'm glad for that, because I would rather that the caretakers of these precious textiles think twice before tossing in them in washing machine with no thought whatsoever!


Below is some basic info about what has worked for me.  Of course, there is lots more detailed info on line, so be sure to see what other info you can find.

First of all, a few tips of what NOT to do:
  • Do NOT dry clean!  Vintage textiles are way too fragile for the harsh chemicals used in dry cleaning.
  • Do NOT use fabric softener or dryer sheets!  I just about croaked when a customer dropped off a quilt for repair that had been machine washed and dried with fabric softener and dryer sheets.  :(  They leave a nasty residue on these fabrics (and on our clothes as well!).


That being said, you CAN wash an older quilt in your washing machine if you follow the tips below.  It's really difficult to get a quilt clean and rinsed completely when washing by hand in the bathtub, so it's fine to use your machine as long as you take care when doing so.

  • First of all, be sure to mend any open seams or tears before washing.  Otherwise, these areas will only get worse when washed.
  • Use a gentle detergent.  Many quilt experts swear by Ovus Paste.  Most quilt shops carry it, or you can purchase it at your local farm supply store because, believe it or not, it's also used for washing horses!  I personally would avoid Woolite and laundry detergents designed for babies because they really aren't that safe or gentle.  More recently, I have been using Norwex's laundry detergent with good results; it doesn't contain fillers and it rinses out easily, which eases my concerns.
  • Wash in the machine with cold water on gentle cycle.  The most important thing is to take care when removing it from the machine.  A wet quilt is heavy, and wet fibers are fragile.  I usually take a sheet and place it under the quilt while it's still in the machine before removing it.  Then, remove from the machine by holding onto the sheet, not the quilt.  That way, there is no stress on the weak fibers.
  • Then, I carefully lay it flat to dry, squaring it up if possible.  Never hang a quilt to dry.  You can dry it outside with a a sheet underneath, but I'm always concerned about bug or bird dirt.  If you have enough space indoors, lay it flat and allow it to dry.  A fan or dehumidifier is helpful in speeding up the drying process.

Click here to read another post I had written on the same subject a number of years ago.  In this post I gave tips on protecting fraying fabrics or patches.

These recommendations are for quilts made out of cotton fabrics.  If your quilt is made of satin or other non-washable fabrics, do not attempt to wash it!   Dry cleaning isn't a good option either, so some people put a nylon stocking over their vacuum cleaner nozzle and remove dust and loose dirt by carefully vacuuming it.

Click here for more detailed info about this subject.


Sunday, June 14, 2015

Some More Vintage Quilt Tops to Finish


I have the privilege of finishing two lovely vintage quilt tops for a local family.  They found them when cleaning out their father's apartment in preparation for his move to an assisted living facility.  (It's amazing what gets discovered in that process!)


This nine-patch postage stamp quilt was entirely hand pieced - very inspiring....  It has an amazing assortment of fabrics (civil war era mixed with 30's prints) and very few repeats of prints.  It needs a bit of repair at the edges, but other than that, it is in great shape.  I'm planning to knot it in the center of each block, which will help draw your eye to the design.

The more I contemplate Jen Kingwell's approach to quilting, the more I wonder if I should attempt to hand-piece something similar.  It's such a remarkable quilt....


I'm guessing this second quilt is an Ocean Waves pattern??  I'm thinking I'll hand quilt this one with a simple utility stitch.


I could stare at these fabrics all day (which I was able to do while basting both quilts!!)....

Wednesday, June 10, 2015

Antique Quilt Photo Shoot


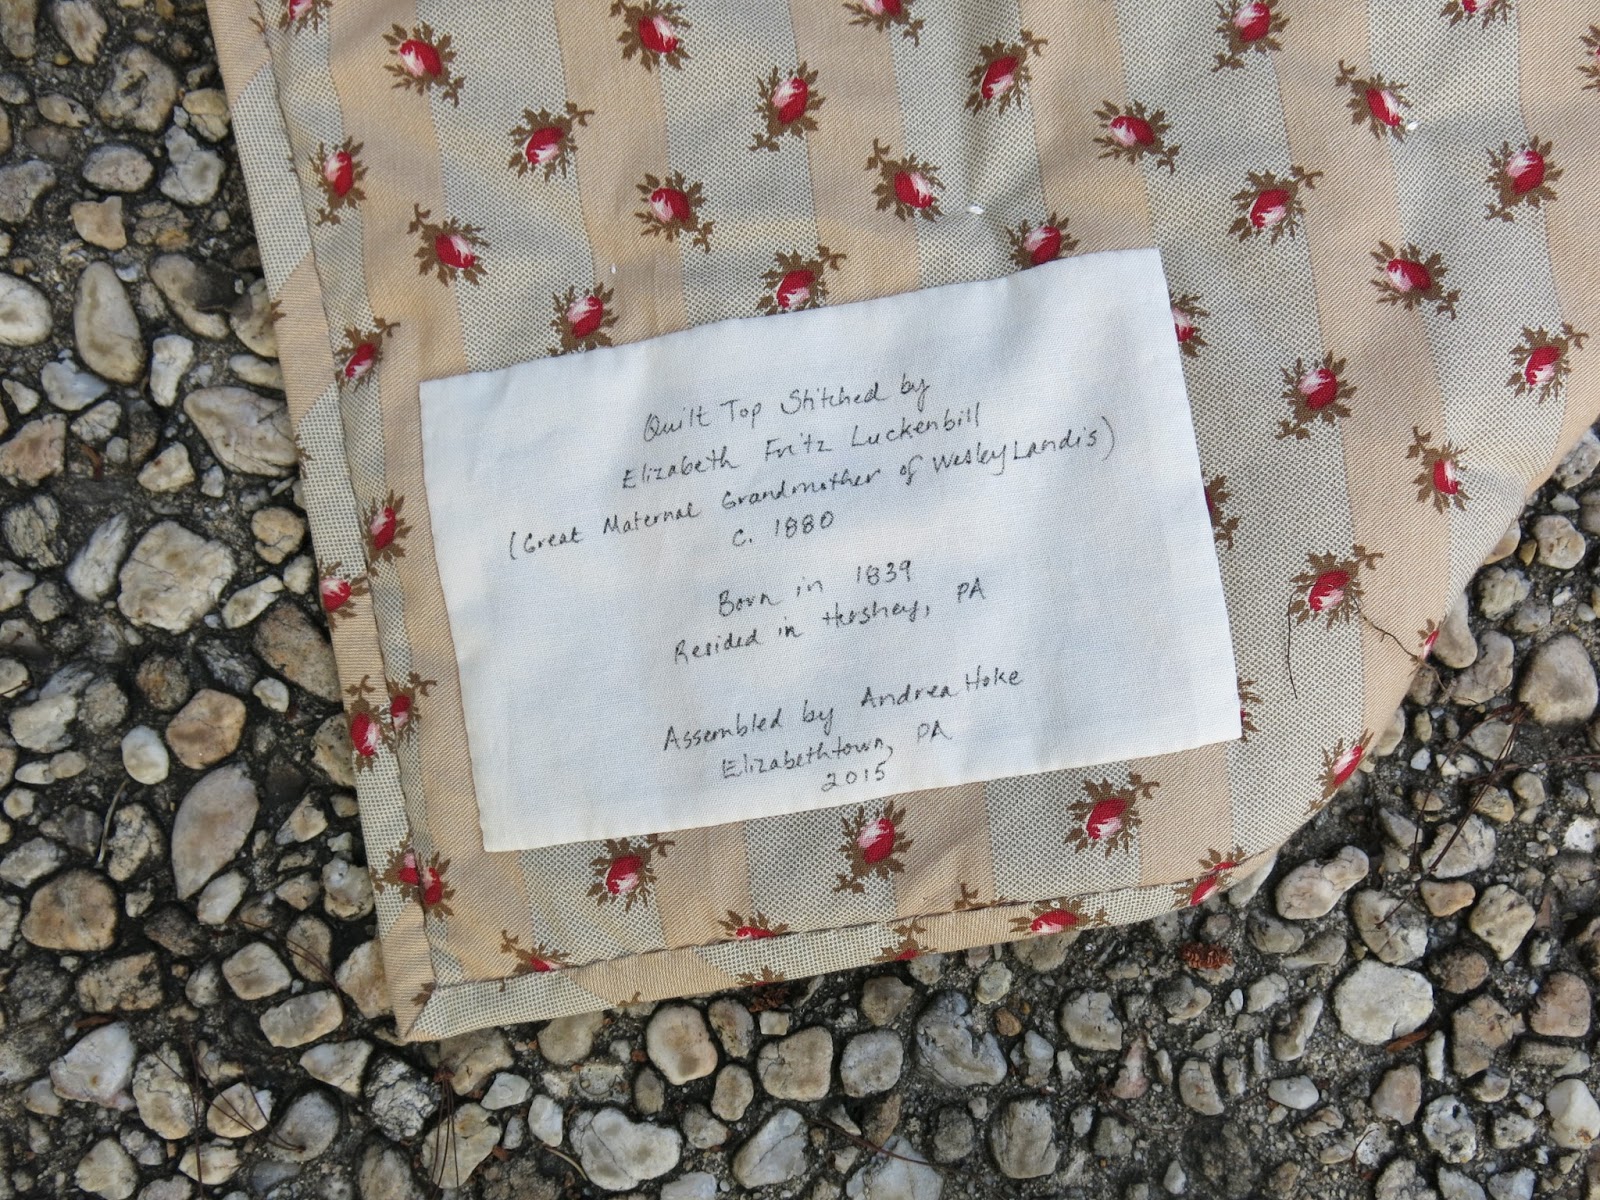
I had the pleasure of finishing another antique family quilt top for Mr. Landis.


The colors were so lovely, and the quilt so nicely designed and constructed that it deserved a photo shoot.  (OK, I'll admit it - I believe that every quilt deserves its own photo shoot!)


According to Mr. Landis's careful historical records, the quilt was stitched sometime around 1880.  He's right on the money as far as I'm concerned; his family records match my conclusions after I compared the fabrics in the quilt with the photos in my Dating Fabrics book: 


I debated and debated about how I should finish the quilt.  Since it is a c. 1880 quilt and was pieced by hand, machine quilting was out of the question.  I really wanted to do it justice and had planned to hand quilt it with a large utility stitch, 


but at the last minute I saw this quilt at an antique fair and concluded that simply knotting it might be be acceptable after all.


I used Hobb's 100% wool batting and knotted it with perle cotton #5.


As always, it's oh so important to document these antique quilts for future generations.


I thought this quilt was absolutely beautiful, so some of these pictures are for my own enjoyment and remembering.
:)


(Thanks, Linda, for suggesting this lovely spot at the college for photographing my quilts, and for tipping me off as to the perfect time of day when the lighting is best!)

Sunday, January 25, 2015

On Location


There's nothing more meaningful than photographing a quilt in its perfect setting.  But, it's an elusive art, since anyone who has photographed a quilt knows that all the stars must align in order to be able to do that - weather, lighting, correct camera settings, time, an easily accessible location that accentuates the quilt, and, able and willing quilt holders who don't mind being barked at ("move a little to your right", "your feet are showing", "I can see your hands", "be careful, the quilt is dragging", etc. etc.!). 

A quilt blogger I follow described the challenge well in this post.


But today, all the stars were all in alignment!!  Or better said, God was so gracious in providing everything I needed to photograph these two extraordinary quilts this afternoon, even if my camera settings weren't perfect.
Even the rain held off until the drive home!


My friends Julia & Alan were kind enough to let me photograph this beauty at their fabulous home in Hummelstown, PA,


... the very same town in which the quilter who pieced the quilt top had lived.


I had the wonderful privilege of knotting and binding this quilt top for my friend Leann's father. 


He and Leann discovered the top when they were cleaning out his house in preparation for his upcoming move to a retirement community; the circa 1930 top was stitched by Leann's great-great grandmother. 


I have never seen a crazy quilt in this star design before - it was beautifully done,


... with fabulous hand stitching.


I named it "Crazy Stars", and added a label so that it's documented for future generations.


Thanks, Julia and Alan!

~~~~~~~

Now, on to location number two!


My sister Alison was the willing and able quilt holder for this quilt.


This lovely, lovely quilt top was stitched by Leann's mom, Janice Landis, sometime around 1970.
I simply machine stippled it so as not to distract from its wonderful design.


I was thrilled that I was able to find a backing fabric that worked so well with all the fabulous colors.


I love it!!


Don't you just LOVE the fabrics?!


We took pictures at the church Janice attended her entire life.


Thanks so much, Alison!

And, thanks too, to my nephew Ricky for the photo bombs:


(My sister had slipped off her boots so she didn't break her neck on the step stool.  Amazing what an 11-year old can do to entertain himself!)
:)


Leann and Mr. Landis, it was such a privilege to finish these quilt tops - thanks especially to you!!


Saturday, July 26, 2014

Photo Shoot at Blossom Hollow Farm


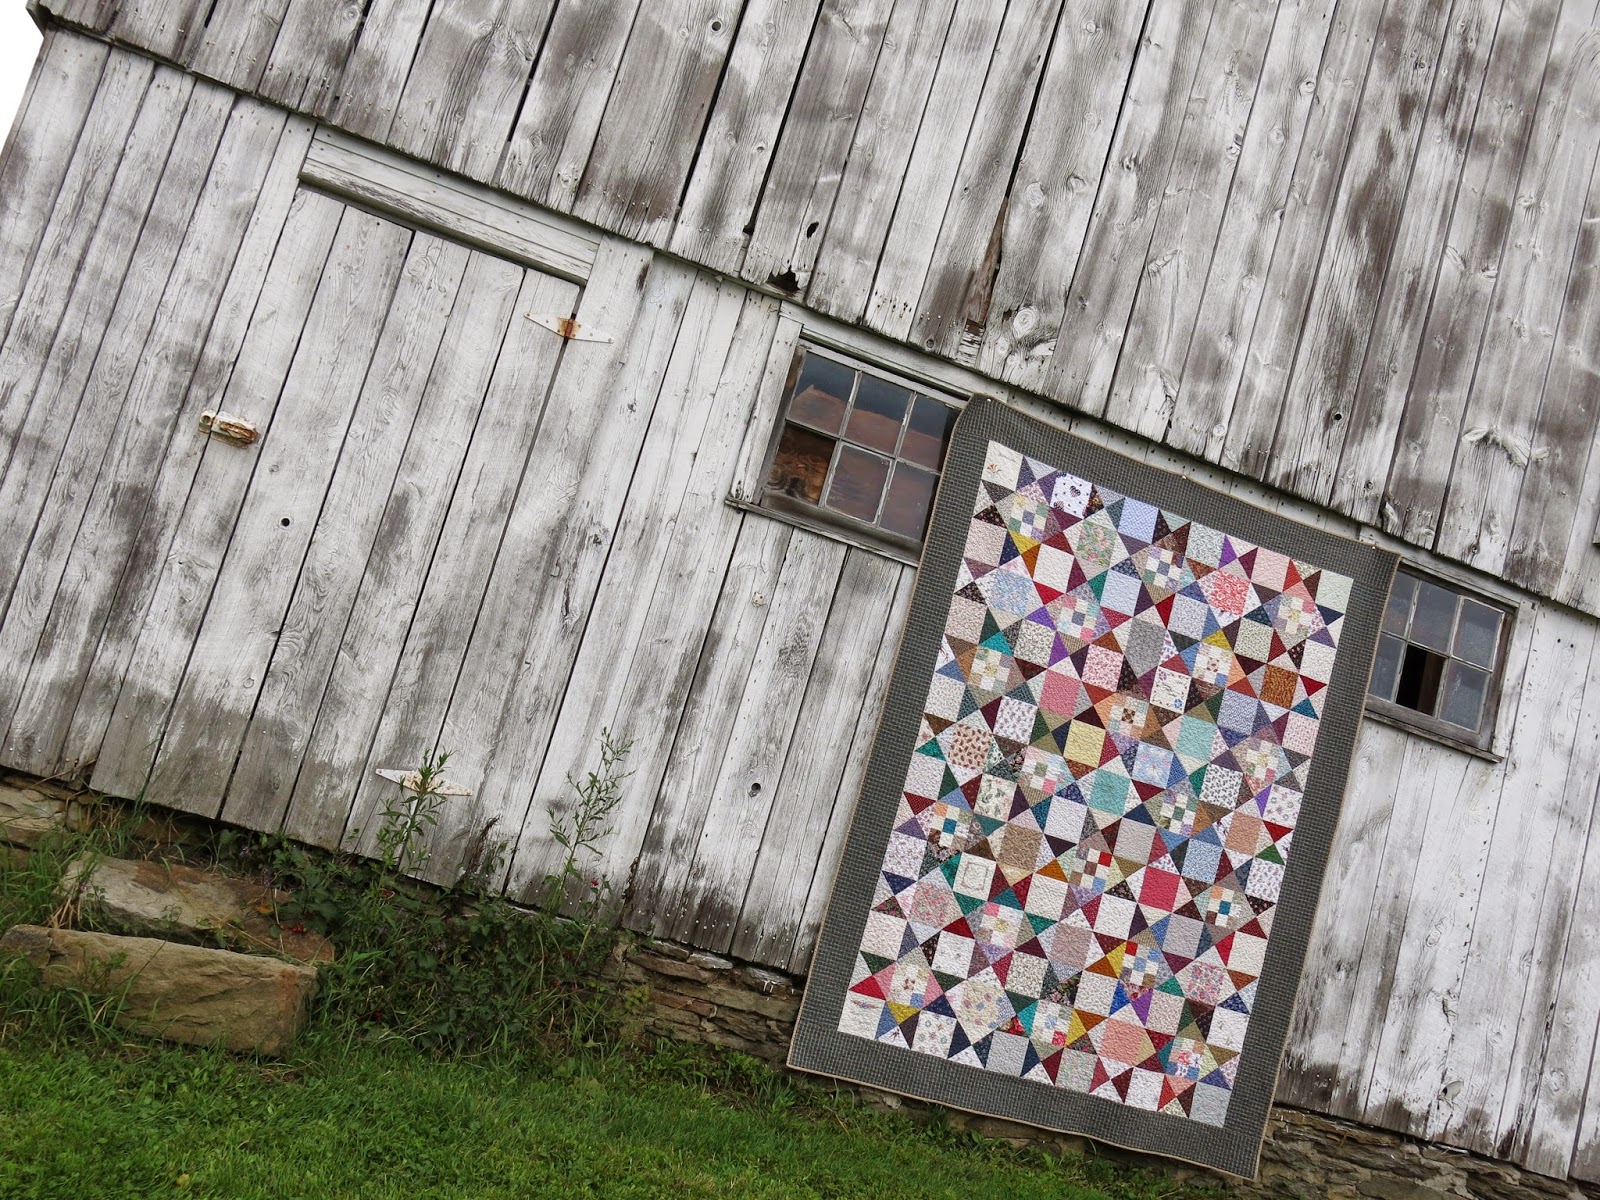
My cousin John was kind enough to help me mount some family quilts on their barn for a photo shoot during our family reunion this weekend!


I wanted to take a picture of this quilt at the family farm since it had been pieced by my Grandma Learn.


Before she died, my grandmother gave the unquilted top to my sister Alison, then I machine quilted it for her for Christmas last year.


I have no idea what the name of the quilt pattern might be,


but I love its scrappy look!


I also wanted to take a picture of this quilt on the farm since my mother, my two sisters, my aunt, and my two cousins all stitched identical quilts together over the course of  three years back in the 90's.


We each included a signature block.


I grow more and more attached to this quilt each year!


I had originally hand quilted it with minimal stitching, but just wasn't pleased with it.


So, this year I stippled it, over top of the hand quilting.


Since I used Warm & Natural batting, it shrunk beautifully when I washed and dried it, giving it the vintage feel I love.


I'm so grateful for the quilting heritage from my mom's side of the family!