
This is my technique for neatly covering zipper ends with zipper tabs for zip pouches!

I use this same technique for pillows too, especially if the pillow doesn't have binding or has more of a modern esthetic to it. There are tons of tutorials already out there, but everyone's measurements and techniques are slightly different, so I decided it was time to document my own method, both for you and for me!

First of all, I always start with a zipper long enough that both metal stops extend beyond the body of the pouch. It's so much easier! This way you don't have to worry about accidentally hitting one of the metal stops with your machine needle, potentially breaking the needle or messing up the timing on your machine. In fact, I keep a supply of 14" zippers on hand from an Etsy shop called Zipit (one in every color they carry!) so that I always have a zipper to choose from. Occasionally I need a longer zipper, especially for pillows, but 14" is almost always long enough when it comes to zip pouches. Then, from time to time I simply order replacement zippers for the zippers I used up from my supply.

OK, here's how to go about it!
Slice off the metal bottom stop with a rotary cutter. (I have a rotary cutter designated for paper and zipper cutting.)

Now trim down the other end of the zipper so that the length of the zipper tape is 3/4" shorter than the length of the unfinished pouch piece.

But, be sure to slide the zipper tab in before slicing so that it doesn't get cut off!

This is what your trimmed down zipper should look like.

To make the fabric-covered zipper tabs, cut a strip of fabric 1-1/2" x 4".
Press in half lengthwise.

Open fabric strip up, fold lengthwise edges into the center, and press again.

Fold and press one more time.

Cut pressed strip in half, yielding two tabs.
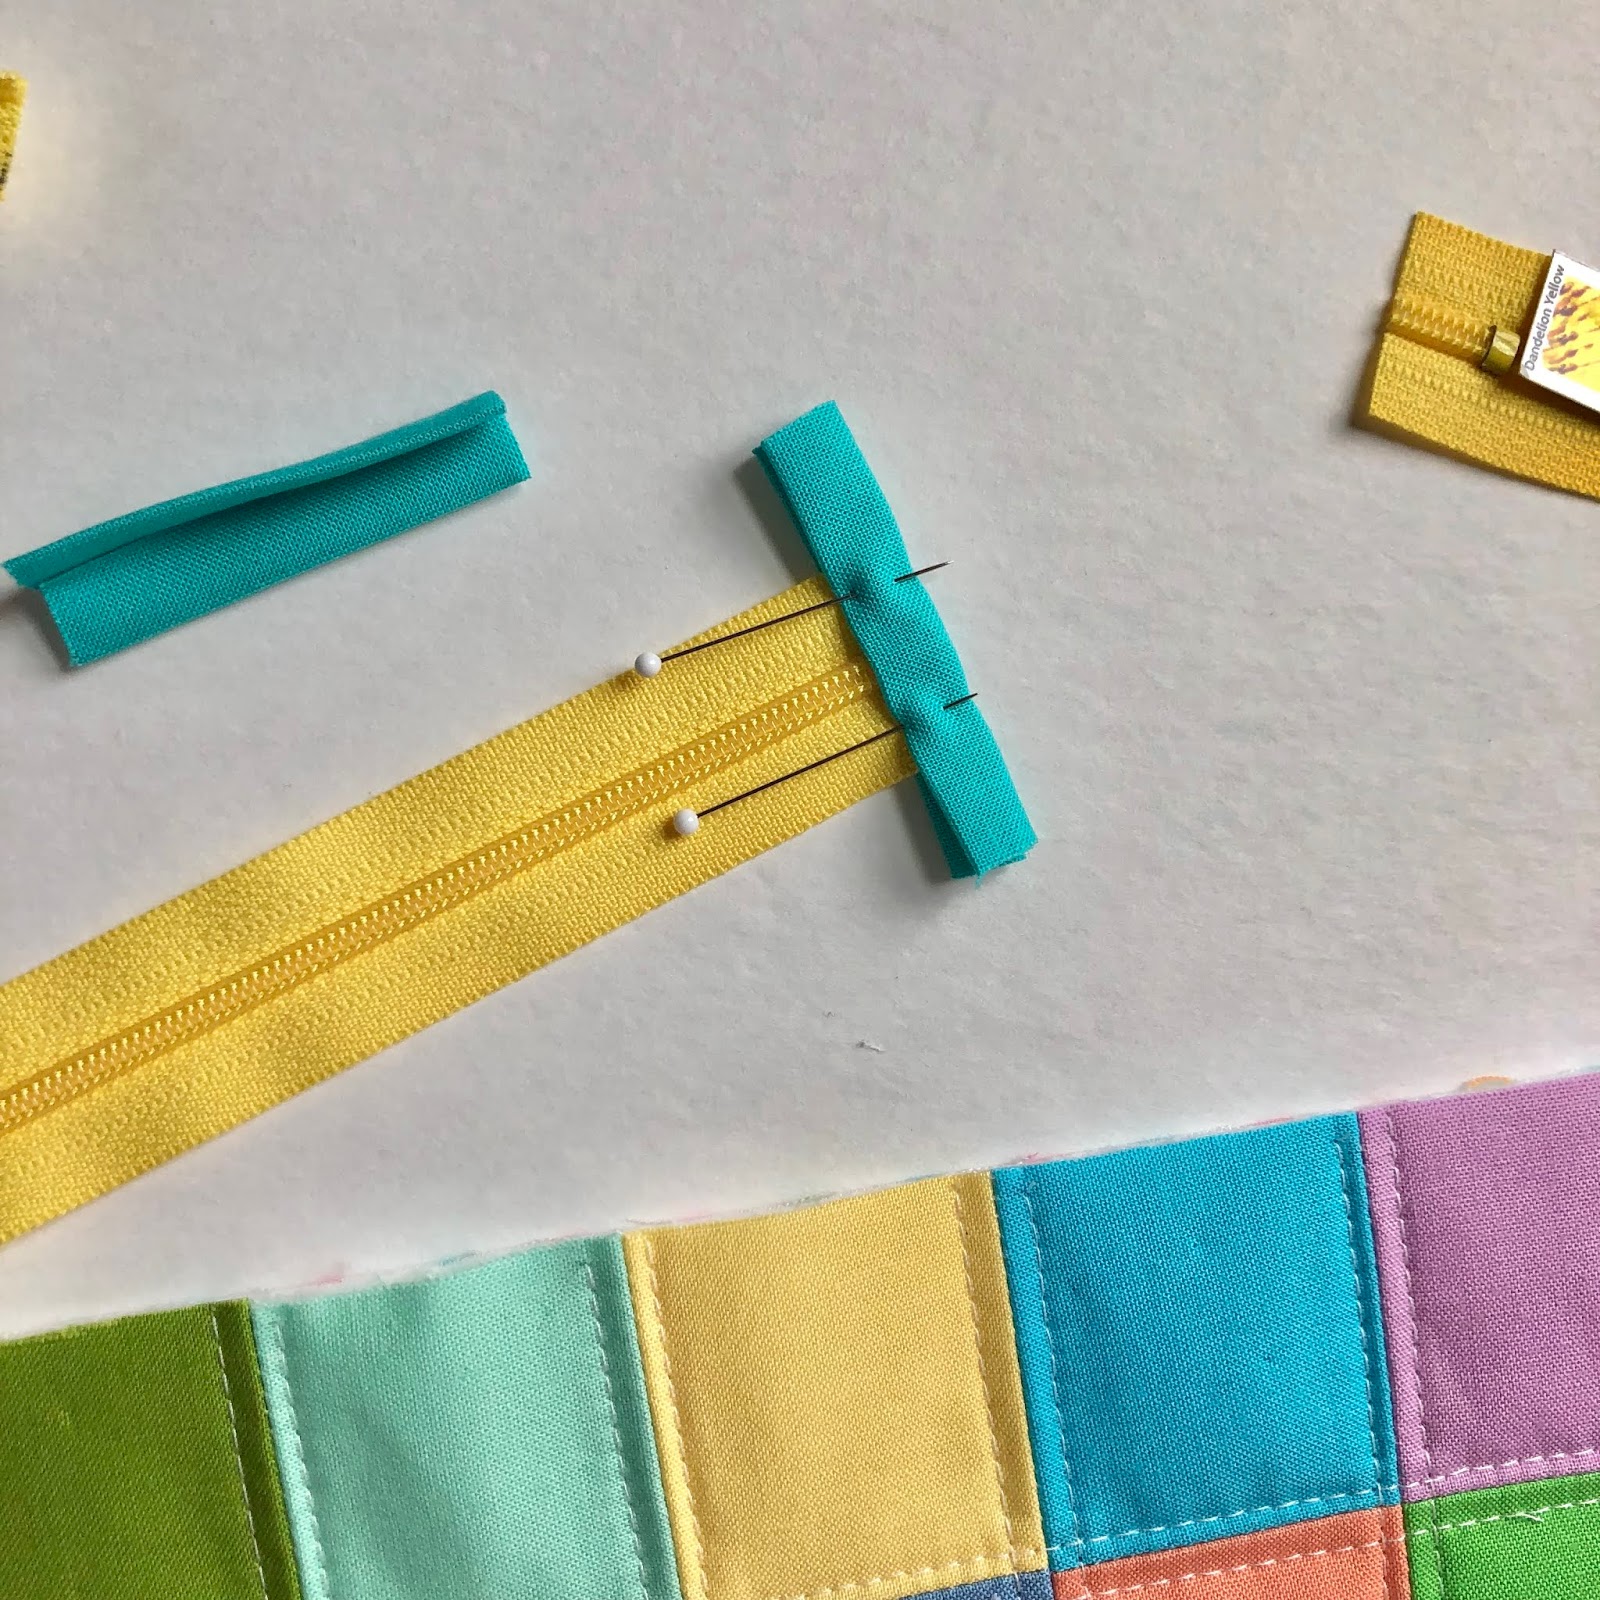
Slip zipper into the tab, making sure the end of the zipper is the whole way in and butted up against the folded edge. Pin.

Repeat on other end of zipper.

Carefully topstitch through all layers. Don't stitch too close to the edge of the fabric fold, or you will run the risk of not catching the under layers of the tab.

The extra length of the fabric makes it easier to stitch a tidy seam, especially those first few stitches.

Trim off excess fabric even with the edges of the zipper tape.
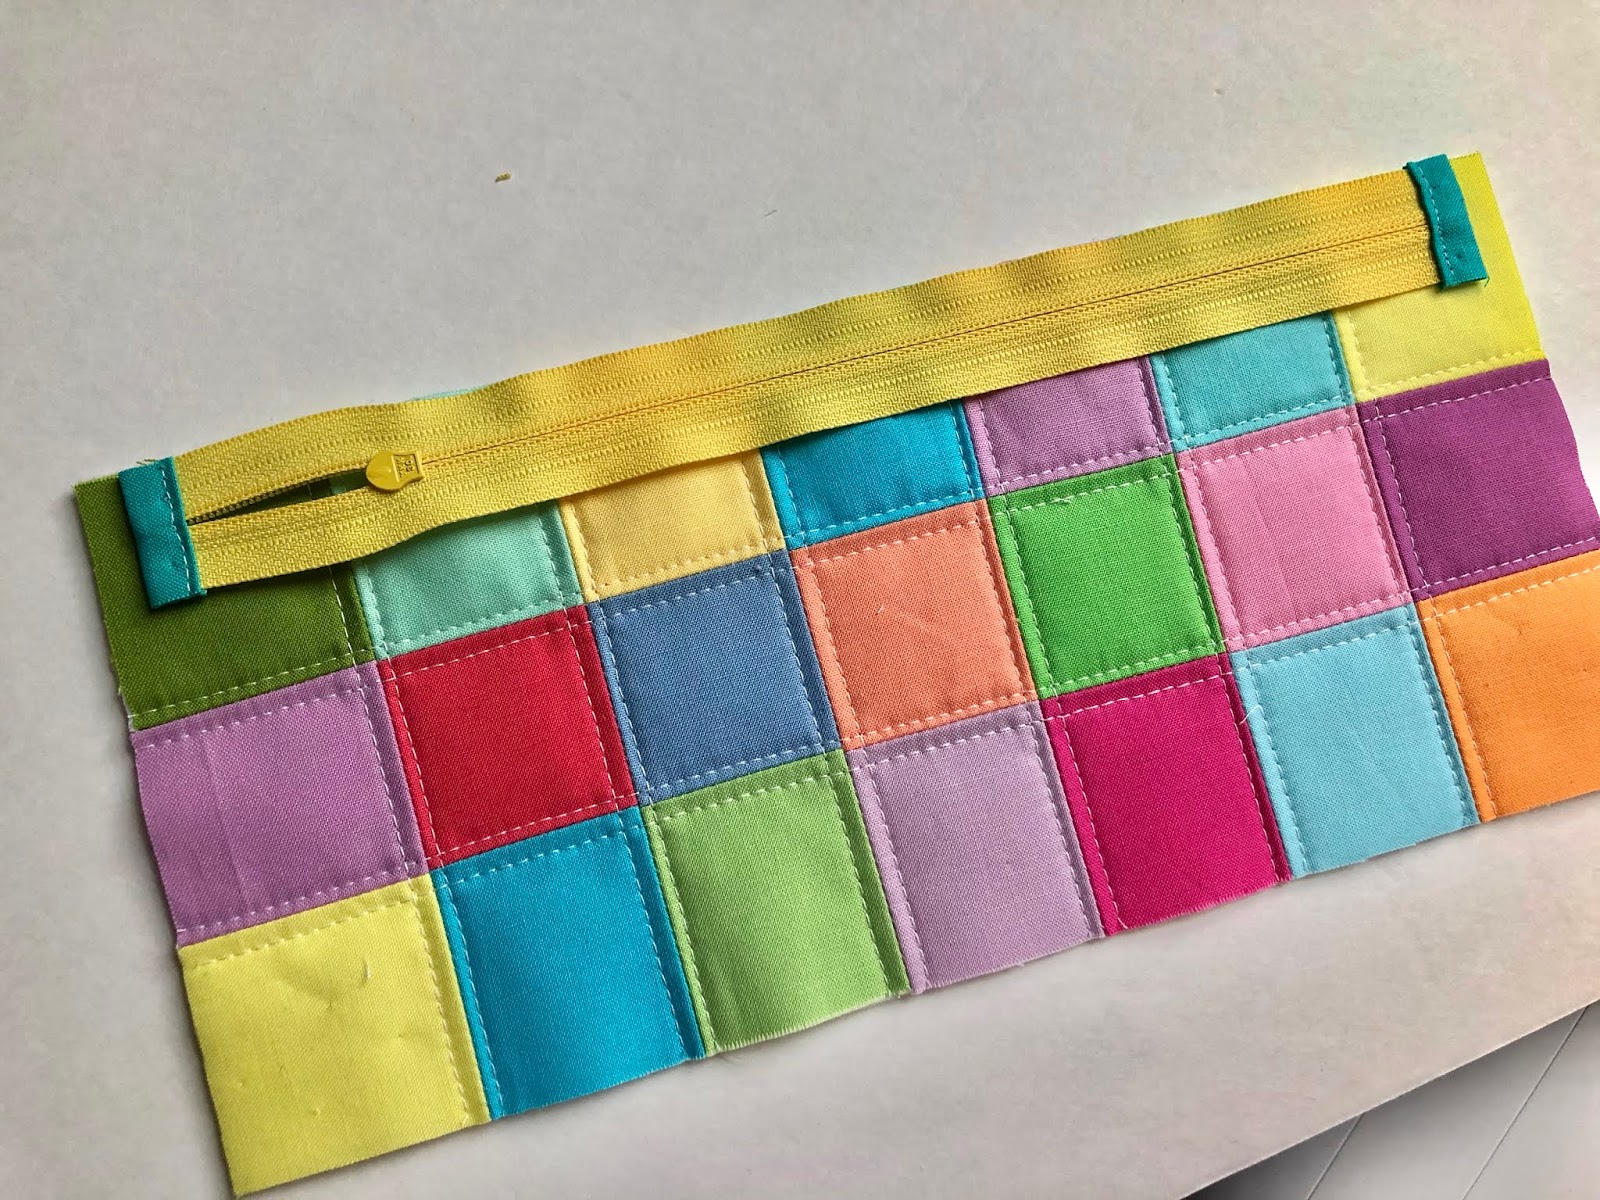
If you were careful about slipping your zipper the whole way into the tab, your covered zipper should still be 1/4 - 3/8" shorter than your unfinished pouch piece on both ends.

Now you can insert your zipper!


You will need to use a zipper foot to install the zipper into the pouch.
If you are using a Bernina zipper foot, simply move your needle the whole way over and line the edge of the foot up against the edge of the zipper tape and stitch.
You can hand baste your zipper if you like, but careful pinning is usually sufficient.

Then, I overcast the raw edge, along with the zipper, with a zig zag stitch. It makes for a nice finish when you peek into the pouch.

And last,
topstitch along the zipper from the outside.

To finish the pouch, open up the zipper (important - or you won't be able to turn your pouch right side out!), pin right sides together, stitch sides and bottom with a 1/4" seam, and overcast the edges with a zig zag stitch. Then, turn pouch right side out and you're finished!

And that's it!
Don't forget to add a tag, of course!
:)