Woo Hoo, I did it - I finally tackled painting a mini barn quilt!
First of all, a
huge shout out to
Julia Davis @redrainbootshandmade - I've been in love with her barn quilts ever since first stumbling across them on Instagram. I've oogled them, missed several of her sales, then was absolutely thrilled to finally snag this beauty last fall. I was so in love with it (and still am!). After it arrived in the mail, I carefully carted it around and showed it to anyone who would give me the me the time of day - ha ha!
And let me tell you, even though these are not terribly difficult to make, hers are a steal and beautifully done, without any effort on your part whatsoever - just saying! :) If you follow her feed on Instagram, she announces her sales ahead of time, and you can order one of your very own from her!
But, if you would like to try making one of your own, this is how I went about it. I had been wanting to try my hand at this for the longest time. And, even after reading numerous blog posts, etc., I was still a little unsure of what would be the best way. Purchasing Julia's and seeing hers up close gave me the courage to try my hand at it.
I'm still playing around with the best how to's, but this will at least get you started.
Here's my version!!
I went with the same size as Julia's - 11" square. That size works perfectly; with a 1/2" border on all sides, you end up with a 10" square for your design, which allows you to easily graph out 2" or 2-1/2" blocks.
I had created a
Mini Barn Quilt Pinterest board of design possibilities and had been collecting images for quite a while. So, when I was ready to get started, I simply picked what I thought might be the easiest design. (If you take a look at my Pinterest board or Julia's Instagram feed, you'll see that Julia has a lot of beautiful designs!)
First of all, I was stumped as to what kind of wood to use. I was concerned that plywood wouldn't have nice, smooth edges on all four sides, so I went with
MDF board (Medium-Density Fiberboard). It's economical; I purchased a 4x4' sheet of 3/4" MDF from
my local lumberyard for $16.59 and had them cut it into 11" squares. One 4x4' sheet yielded sixteen 11" squares - not bad! The 11" size vs. 12" allowed for the "kerf" (the width needed for the saw cuts). After sanding the edges and corners with some 120 grit sandpaper and wiping down with a
Norwex EnviroCloth, everything was nice and smooth and ready for paint.
The next question - what kind of paint works best??
First of all, if you want to display your barn quilt outdoors, I'm guessing you'll need to use plywood vs. MDF, since MDF probably isn't very weather resistant unless sealed properly. And, you'll want to make sure you paint both the front and back or your board to protect it. Also, you'll need to use an exterior paint that already contains UV protectants. But for indoor use, you can pretty much use whatever paint you want.
You'll definitely want to prime the MDF board before applying any paint; the primer seals the board for you, and without it, your paint will just soak into the board. I used one coat of Zinsser Bulls Eye 1-2-3 Primer without any tint added.
Then as far as the actual paint, I went to the paint department at a local hardware store and asked for the smallest quantity of paint available since it doesn't take much paint, especially for the accent color. A 15.5 oz. can of sample paint for about $5 was perfect. It came in satin finish only, so I then purchased a quart of satin-finish paint in an off-white color (my background color), but I could have purchased just a sample can for that part as well. I think I would have been happier with a little less sheen, but in the end it wasn't that big of a deal.

Next question - what kind of brush should I use? Since my boards were small and there were lots of triangles involved, I opted to go with angled paint brushes I had on hand vs. disposable foam brushes, especially I had invested in good quality brushes a number of years ago when I was painting my window sashings, and I'm always aiming for a zero footprint. :) I used a 2" brush for priming and painting the background color, and a 1" brush for the sides of the boards and the accent color. I guess I could have used a paint roller for the primer and background color, but didn't want to mess with all that. I have to confess - I really do NOT enjoy the mess of painting!! :)

I would recommend priming your board a day ahead of time. And, if you can, I would then paint the background color, and give it another day to dry. But of course, I was making these at the last minute for Christmas gifts and had to finish them in one day, so that's not how I went about it - ha ha! One coat of primer and one coat of the background color seemed to be sufficient, but if you are doing a dark background color, you may need to use a tinted primer or use two coats of background color. Canned goods worked nicely to set them on while drying. :)
The next step is choosing a design and then marking your boards. I chose two 4 x 4 block designs and one 5 x 5. I sketched them out on graph paper, but you can simply refer to a photo.
I then marked a grid of dots on the board with a pencil, starting 1/2" from the edge.
I marked my dots 2-1/2" apart for the 4 x 4 block design, and 2" apart for the 5 x 5 block. If you are using a larger board, you may want to draw lines, but the dots are more than sufficient for this size. And, if you are only drawing dots, you don't have to worry about any lines showing after you are finished. That's probably not a big deal on a large barn quilt that would be viewed from a distance, but they would likely show on something that would be viewed up close.
Next part is taping off your design. Be sure to use the green FrogTape; it will give you crisp lines and yield the best results vs. using blue painters tape. You'll probably end up with some bleeding if you use the blue tape.
First, tape off the outer 1/2" border.
Make sure you can still see your dots.
Then, it's simply a matter of taping off each section, painting it, and making sure it's dry before moving on to the next section. Be sure to rub the tape down along the edge so that it is firmly adhered, and be careful not to stretch it. That way no paint will seep under the tape I made sure all my brush strokes were going in the same direction (at least for the most part!). And, I used just enough paint for coverage, but not too much that it took extra time to dry. The secret is using a hair dryer to dry the paint so you can move on to the next section - works like a charm!
BUT, be careful and double check yourself after taping and before painting - it's easy to get confused and paint the wrong square. Trust me - I did it several times!! It's not the end of the world, but a mistake will slow you down, and will mean a bit of sanding and repainting so that it isn't too obvious.
It's always good if you can allow a few days for the paint to cure before wrapping, gifting, or hanging.
I like the look of distressed edges like Julia did,
... so after the paint had completely dried, I sanded the edges a bit with 60 grit sandpaper.
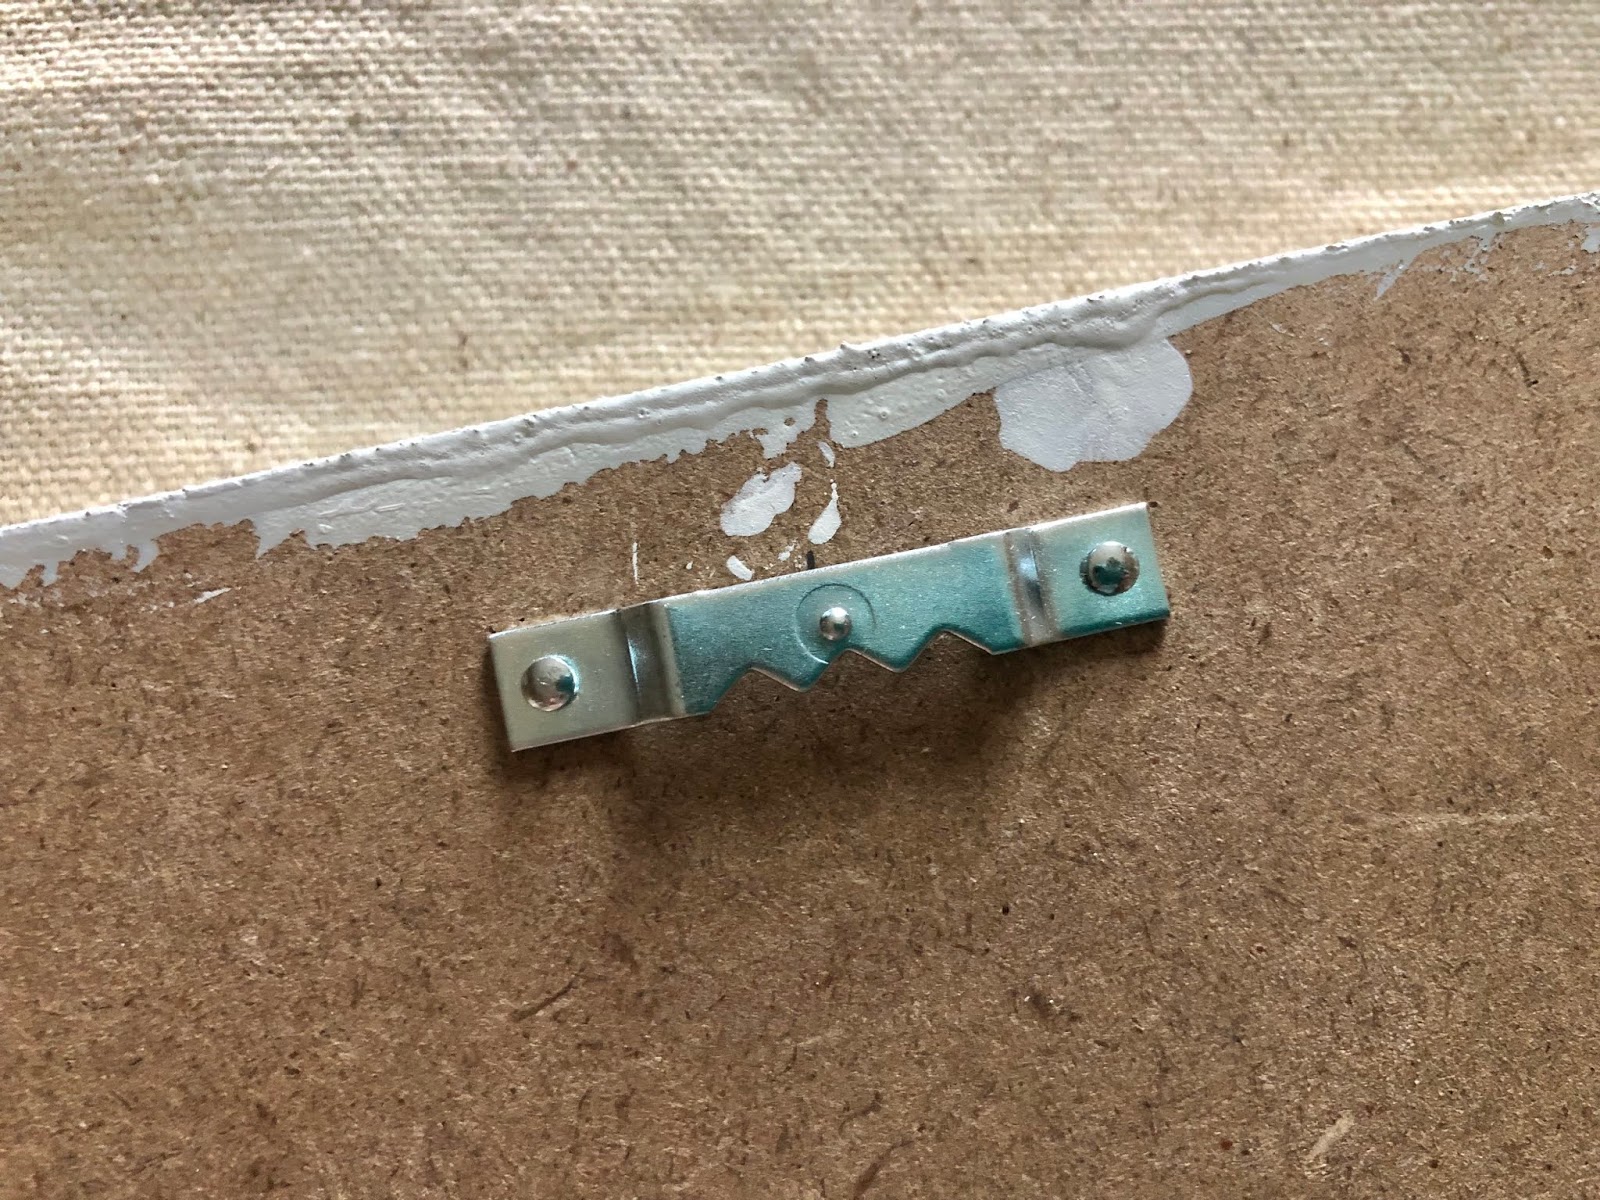
I added a sawtooth picture hanger on the back.
And, then a signature, of course. :)
(I definitely need to come up with a way to keep the back from being so messy!)
And, that's all there is to it!
I'm still hoping to do a larger barn quilt for the back of my garage, and I think I now feel comfortable tackling that project. Whether I ever get around do doing it is another story entirely! :)