This is my favorite pillow closure - super easy and looks great too!
I've been using this method ever since I discovered Sew Inspired's tutorial.
I'm just not a fan of envelope closures; they look kind of sloppy and don't keep a good form, but many people assume that it's the easiest option. However, this method is almost as easy and gives much better results!
I love adding a machine stitched binding for the final touch. :)
If you want to make a simple pillow out of decorator fabric, this method works well also; just sew your pillow right sides together and skip the binding part.
OK, here goes!
Supplies needed:
Prepared pillow top
Backing fabric: 1/2" wider and 3-1/2" higher than your prepared pillow top
Interfacing (if using quilting cotton): slightly smaller than backing fabric (I like Pellon Shape Flex 101.)
Zipper: standard dressmaking zipper at least 1" longer than width of pillow
Binding strips: 2" wide x circumference of pillow plus 5"
If you are starting with a pillow form and want to make a pillow to cover it, cut your pillow top the same size as your pillow form. If you stitch the front and back together with a 1/4" to 1/2" seam, you'll have a nicely filled pillow.

First, prep your pillow top and square it up. If I have machine quilted the top, I like to seal the edges of the machine quilting by stitching 1/8" from the edges.
Cut the backing fabric about 1/2" wider and 3-1/2" higher than your prepped pillow top. This will allow for shrinkage when fusing the interfacing.
If I'm using quilting cotton for the backing fabric, I like to interface it with Pellon fusible Shape Flex 101. It gives quilting cotton the heft and feel of decorator weight fabric. It's a little pricey, but I usually buy it by the bolt from JoAnn's when I have a 60% off coupon.
Cut the interfacing slightly smaller than your backing fabric and fuse according to manufacturer's instructions. A damp press cloth is helpful. Be sure to fuse for the full amount of time recommended by the manufacturer!
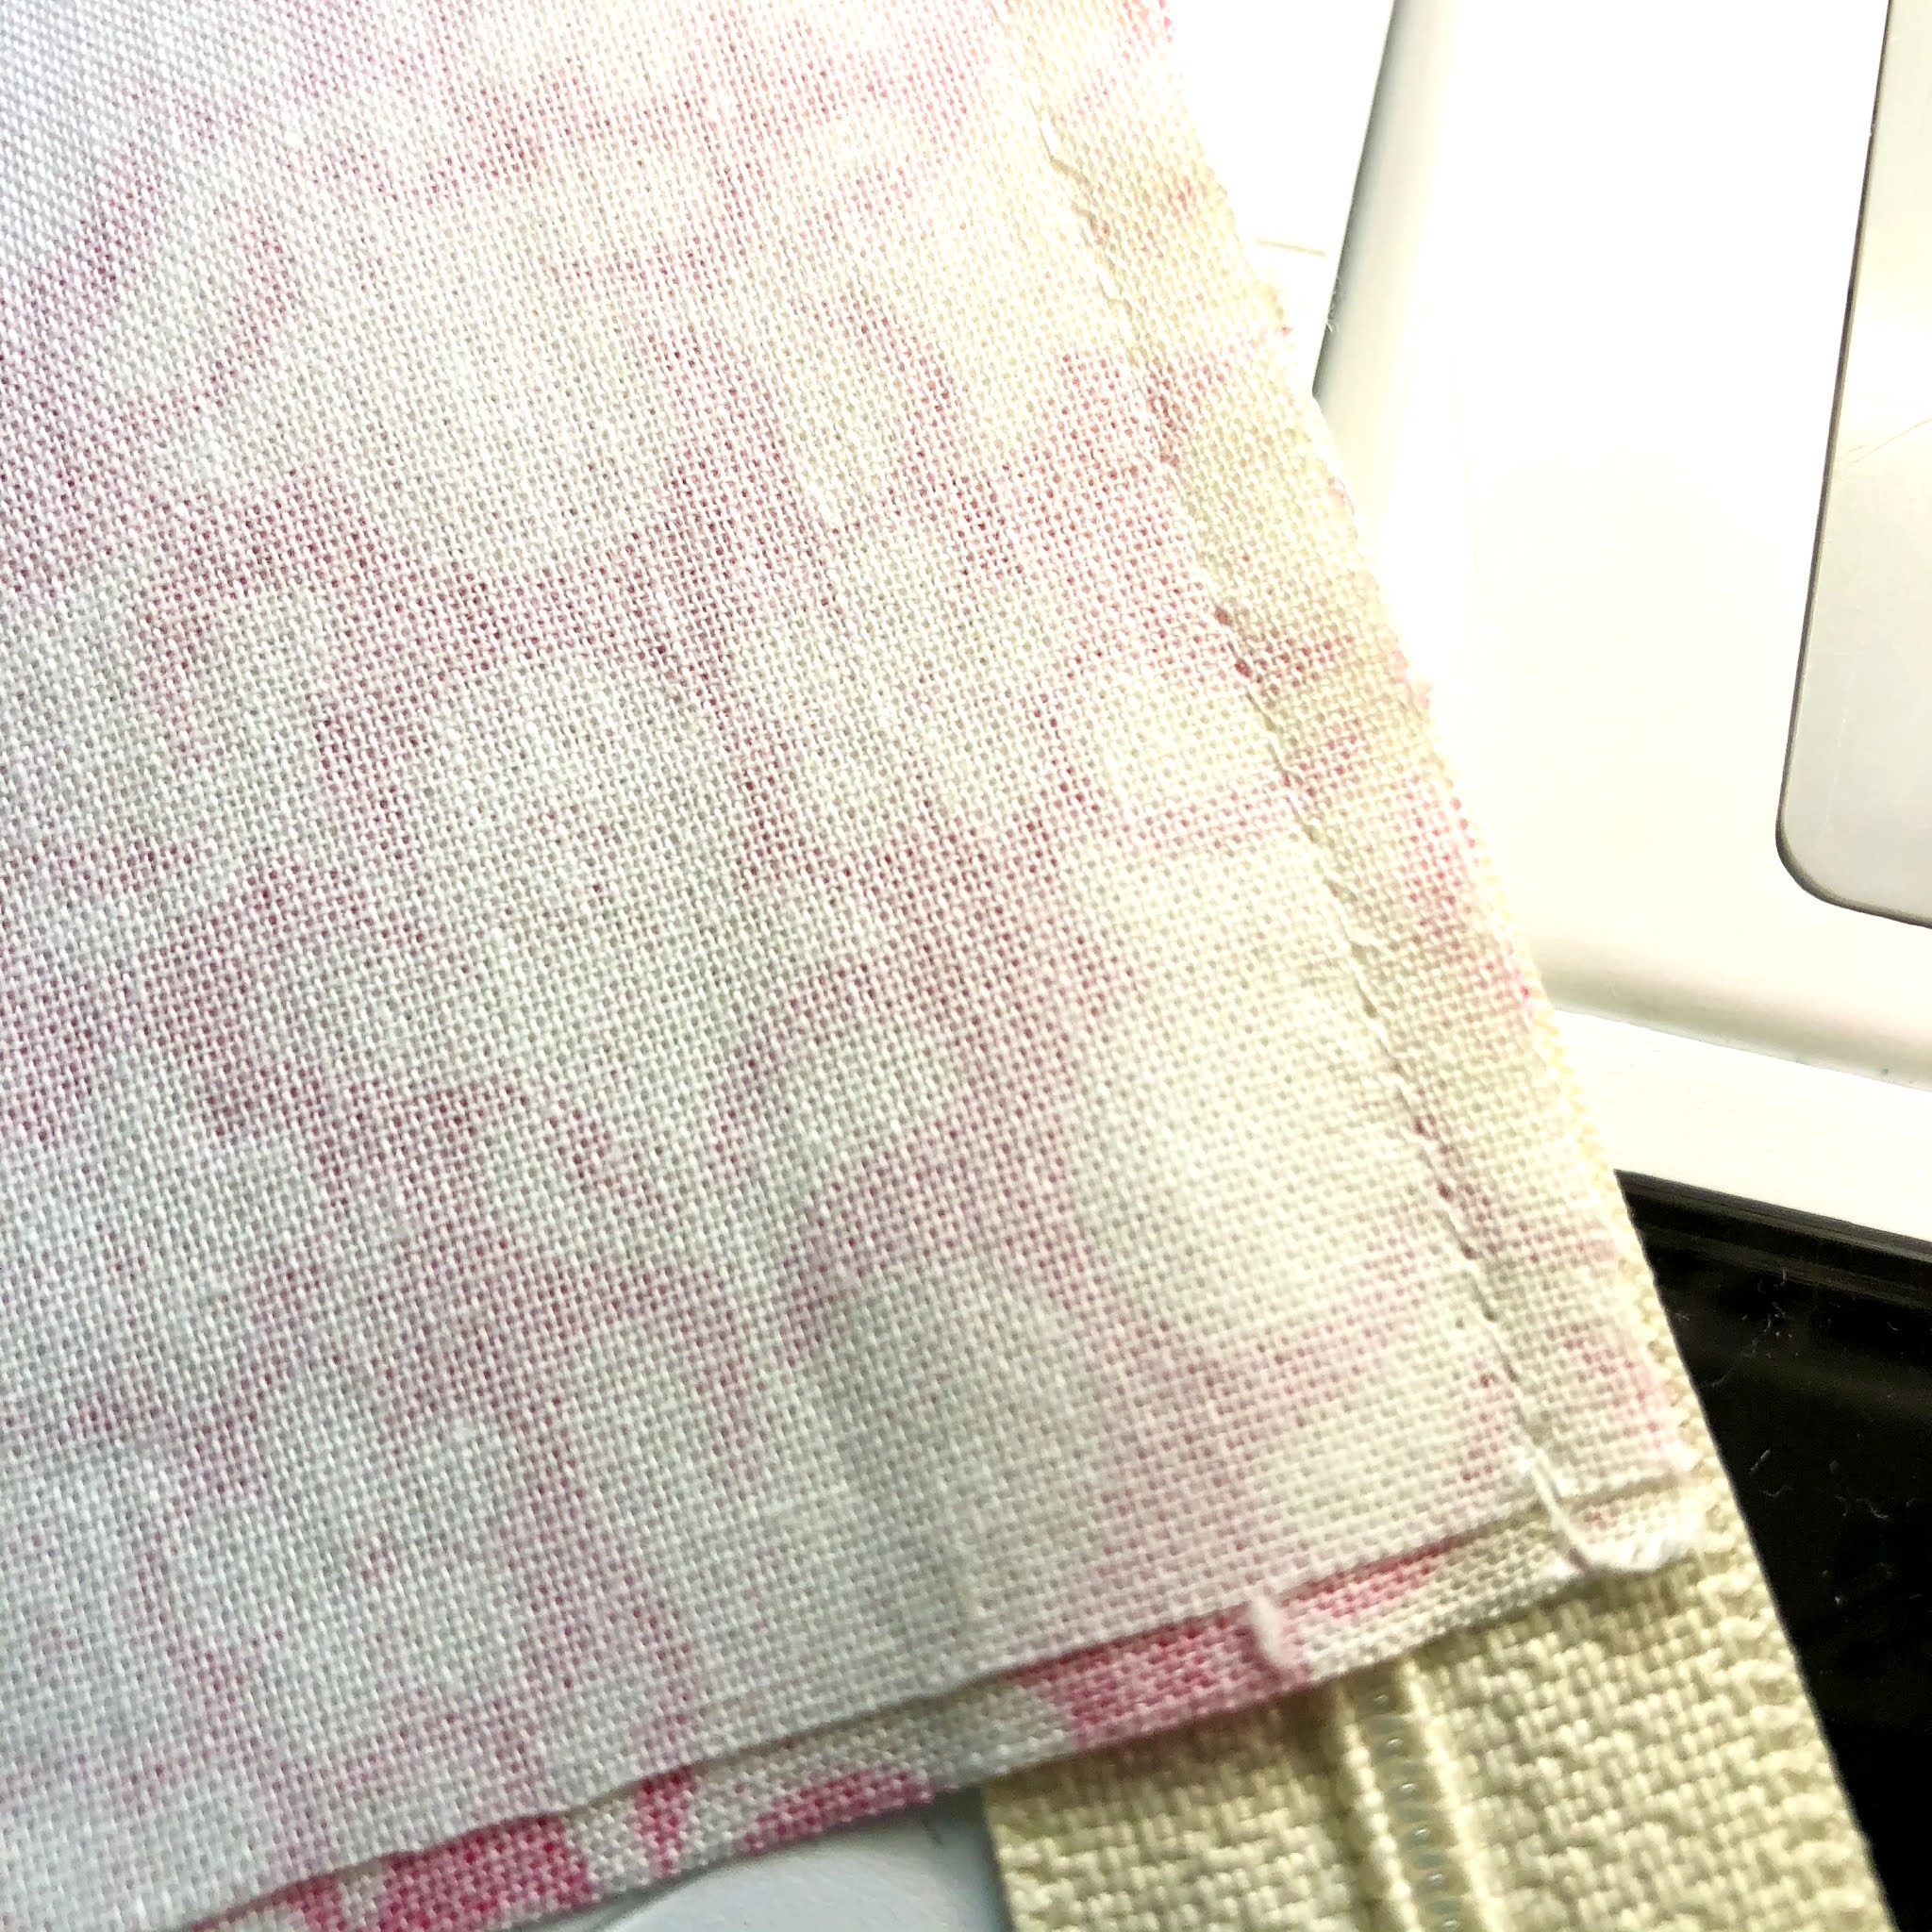
Now, slice 6-1/2" off the narrower edge. (This will be the top of your pillow back.)
Choose a zipper that is long enough so that the zipper pull and metal stop extend past the sides. This way you won't have to worry about your needle hitting any metal parts, resulting in breaking a needle or messing up the timing on your machine. And, the zipper pull will be off to the side and won't require you to slide it out of the way.
Center the zipper right side down on the narrower top piece of the pillow back with the zipper tab to your left; line up the edge of the zipper tape with the edge of the fabric and clip in place with Clover Wonder Clips.
You will be stitching the zipper in place with a zipper foot.
(OK, don't start sweating just because I mentioned zipper foot - it's easy, I promise!!)
This is what the Bernina zipper foot #4 looks like.
You will need to move the needle the whole way over to the left; otherwise your needle will hit the foot and break the needle. (Ask me how I know - I am always breaking needles because I forget to do this, or because I forget to move it back to the center when I've switched back to my patchwork foot!)
***Be sure to use the brand of needles your dealer recommends for your machine. I always use Schmetz needles with my Bernina because they break easily vs. bending and are less likely to damage my machine.
Use the left needle position button and keep pushing it until the needle is the whole way over to the left.
This is what the screen will show when the needle is in the correct position.
To stitch, line up the right edge of the foot with the zipper tape/edge of the fabric.
If you carefully line up the foot when you stitch, you'll have a perfect 1/4" seam!
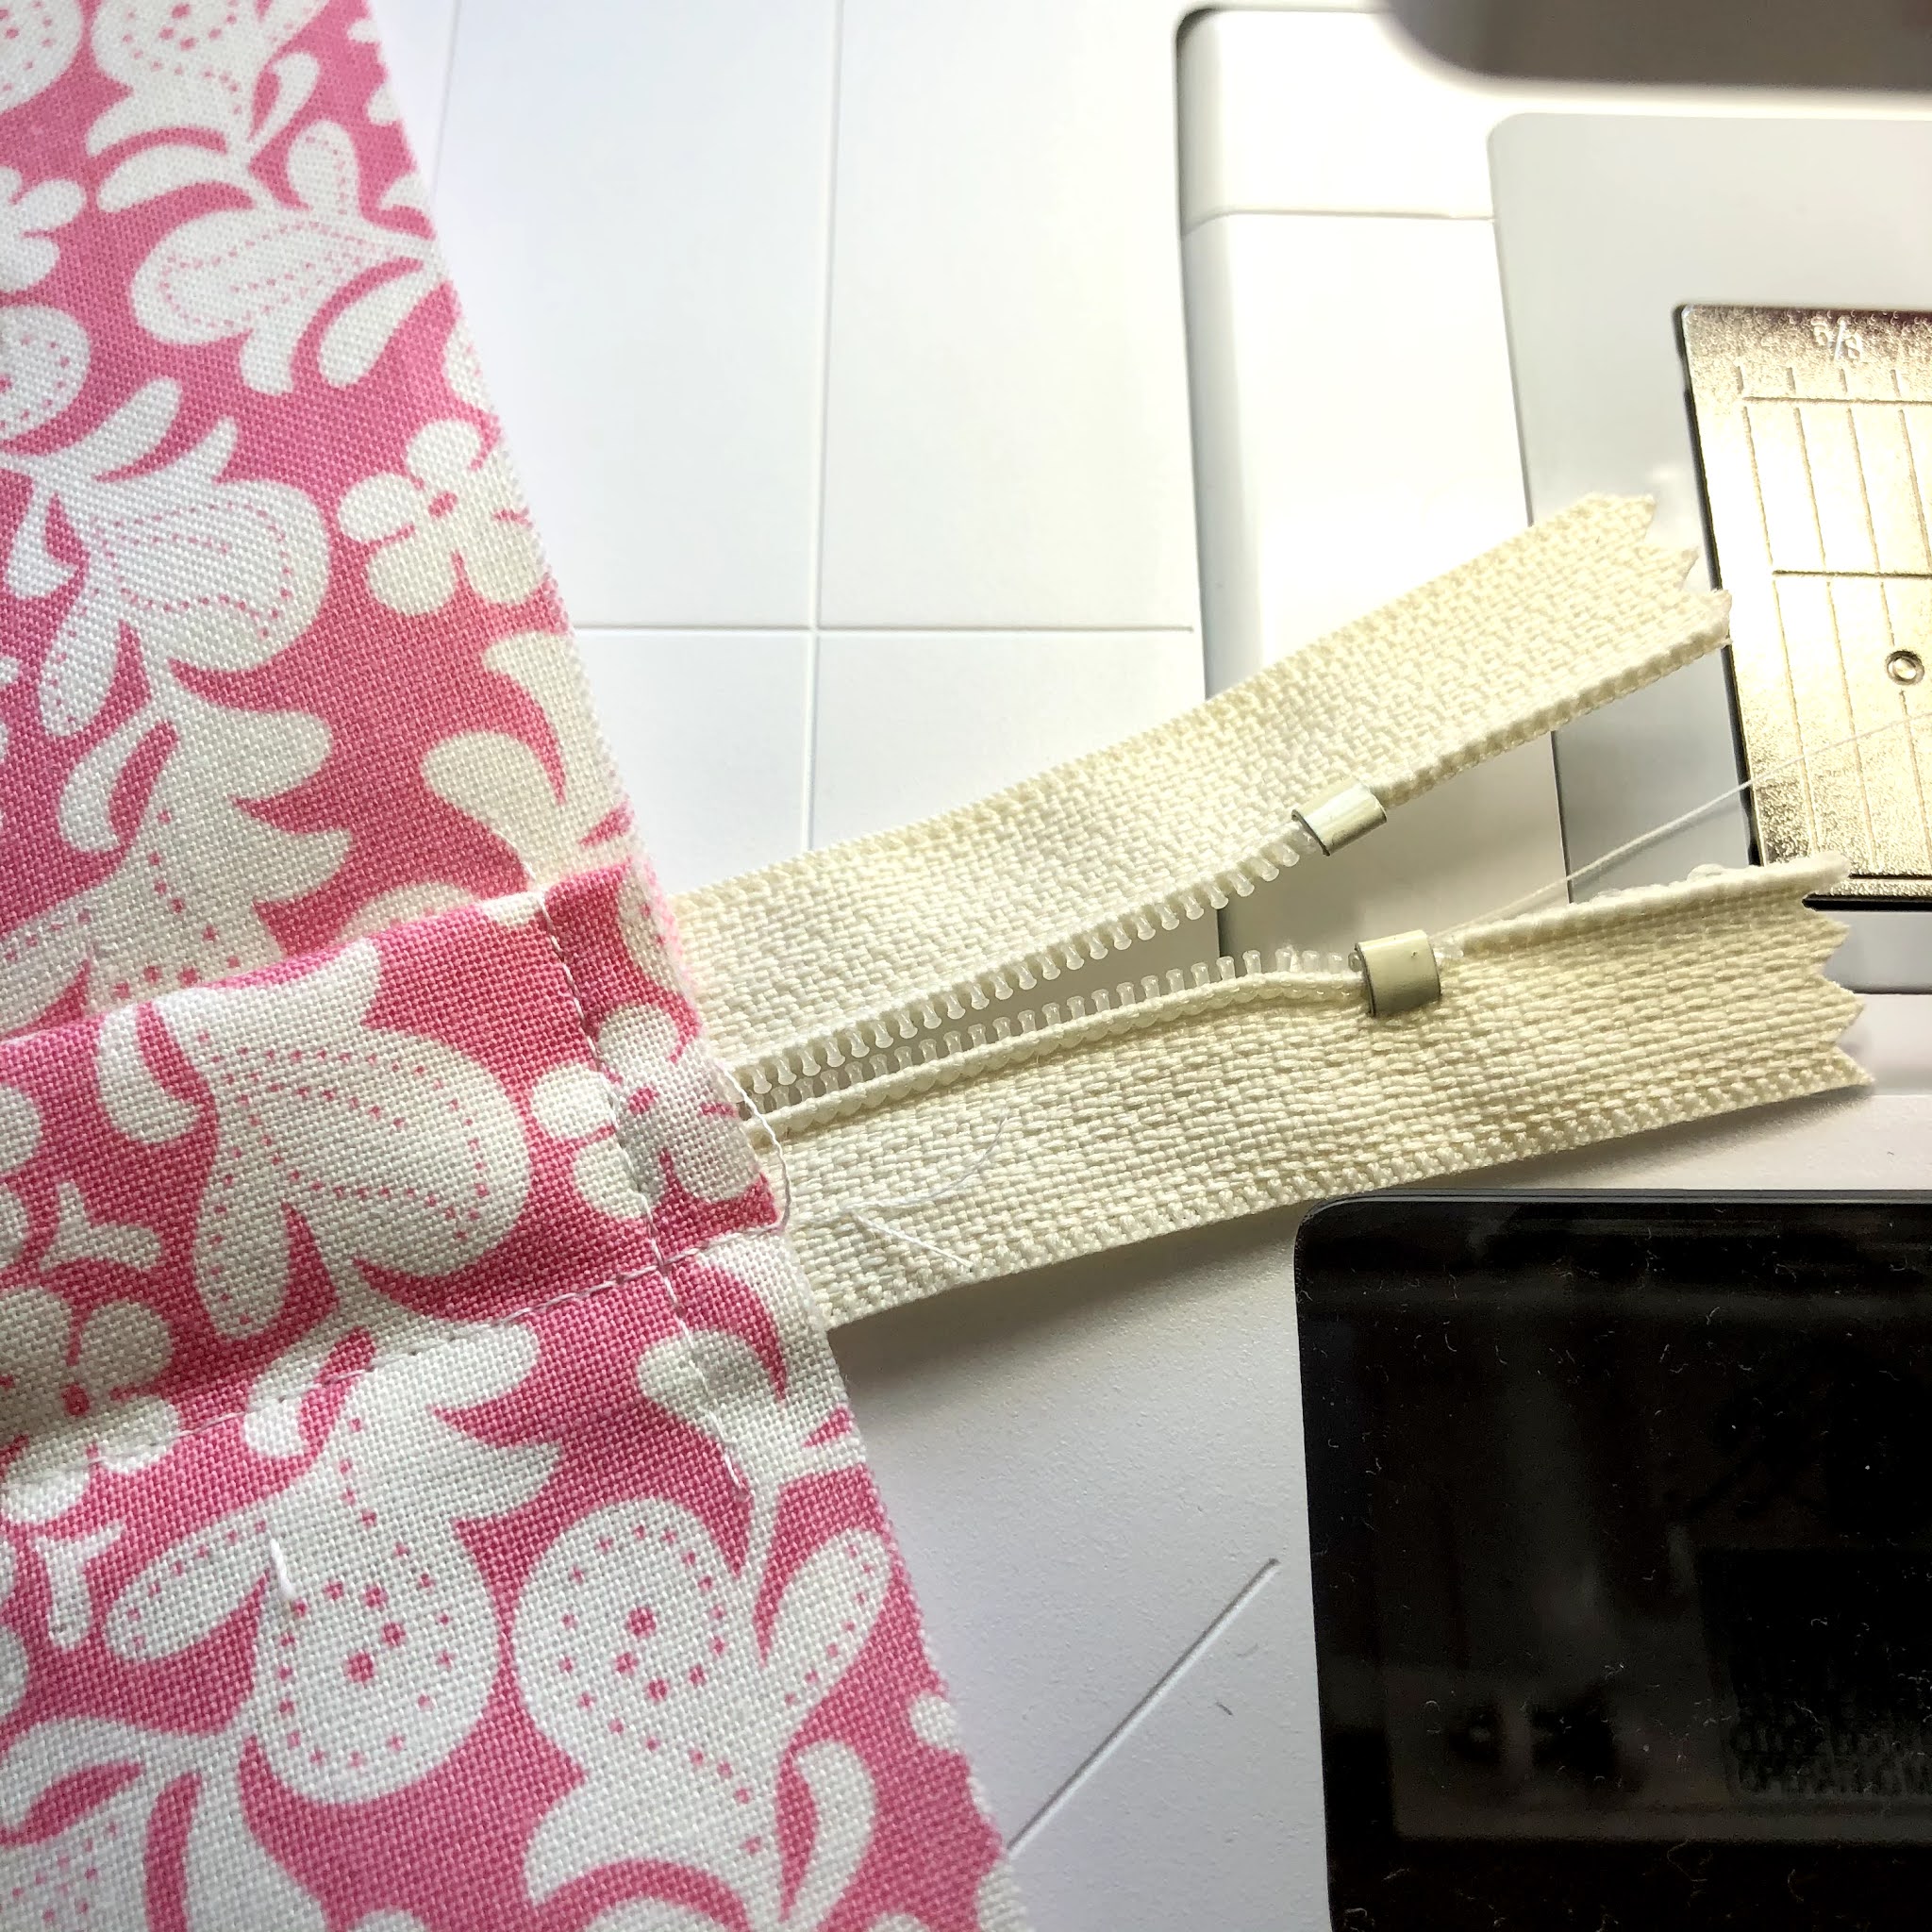
Now fold the fabric back, wrong sides together, leaving a "flap" over the right side of the zipper, about 1" wide. I usually simply eyeball this part.
Position your pins as shown in the picture to make it easy to remove them as you are stitching.
Again, stitch the zipper just like before, lining the edge of zipper foot along the edge of zipper tape. You are basically stitching on top of the previous line of stitching.
This is what the right side should look like. You've created a lovely zipper flap!
Fold the flap back out of the way and pin.
With right sides together, lay the unstitched edge of the zipper along the top edge of the bottom piece of backing fabric, making sure the sides of the backing are even. Clip in place.
Again, stitch the zipper in place with your zipper foot.
Remove your zipper foot and replace it with a 1/4" patchwork foot.
***Make sure you move your needle back to the center position. You can simply press the clear button, or move it back by pressing the right needle position button.
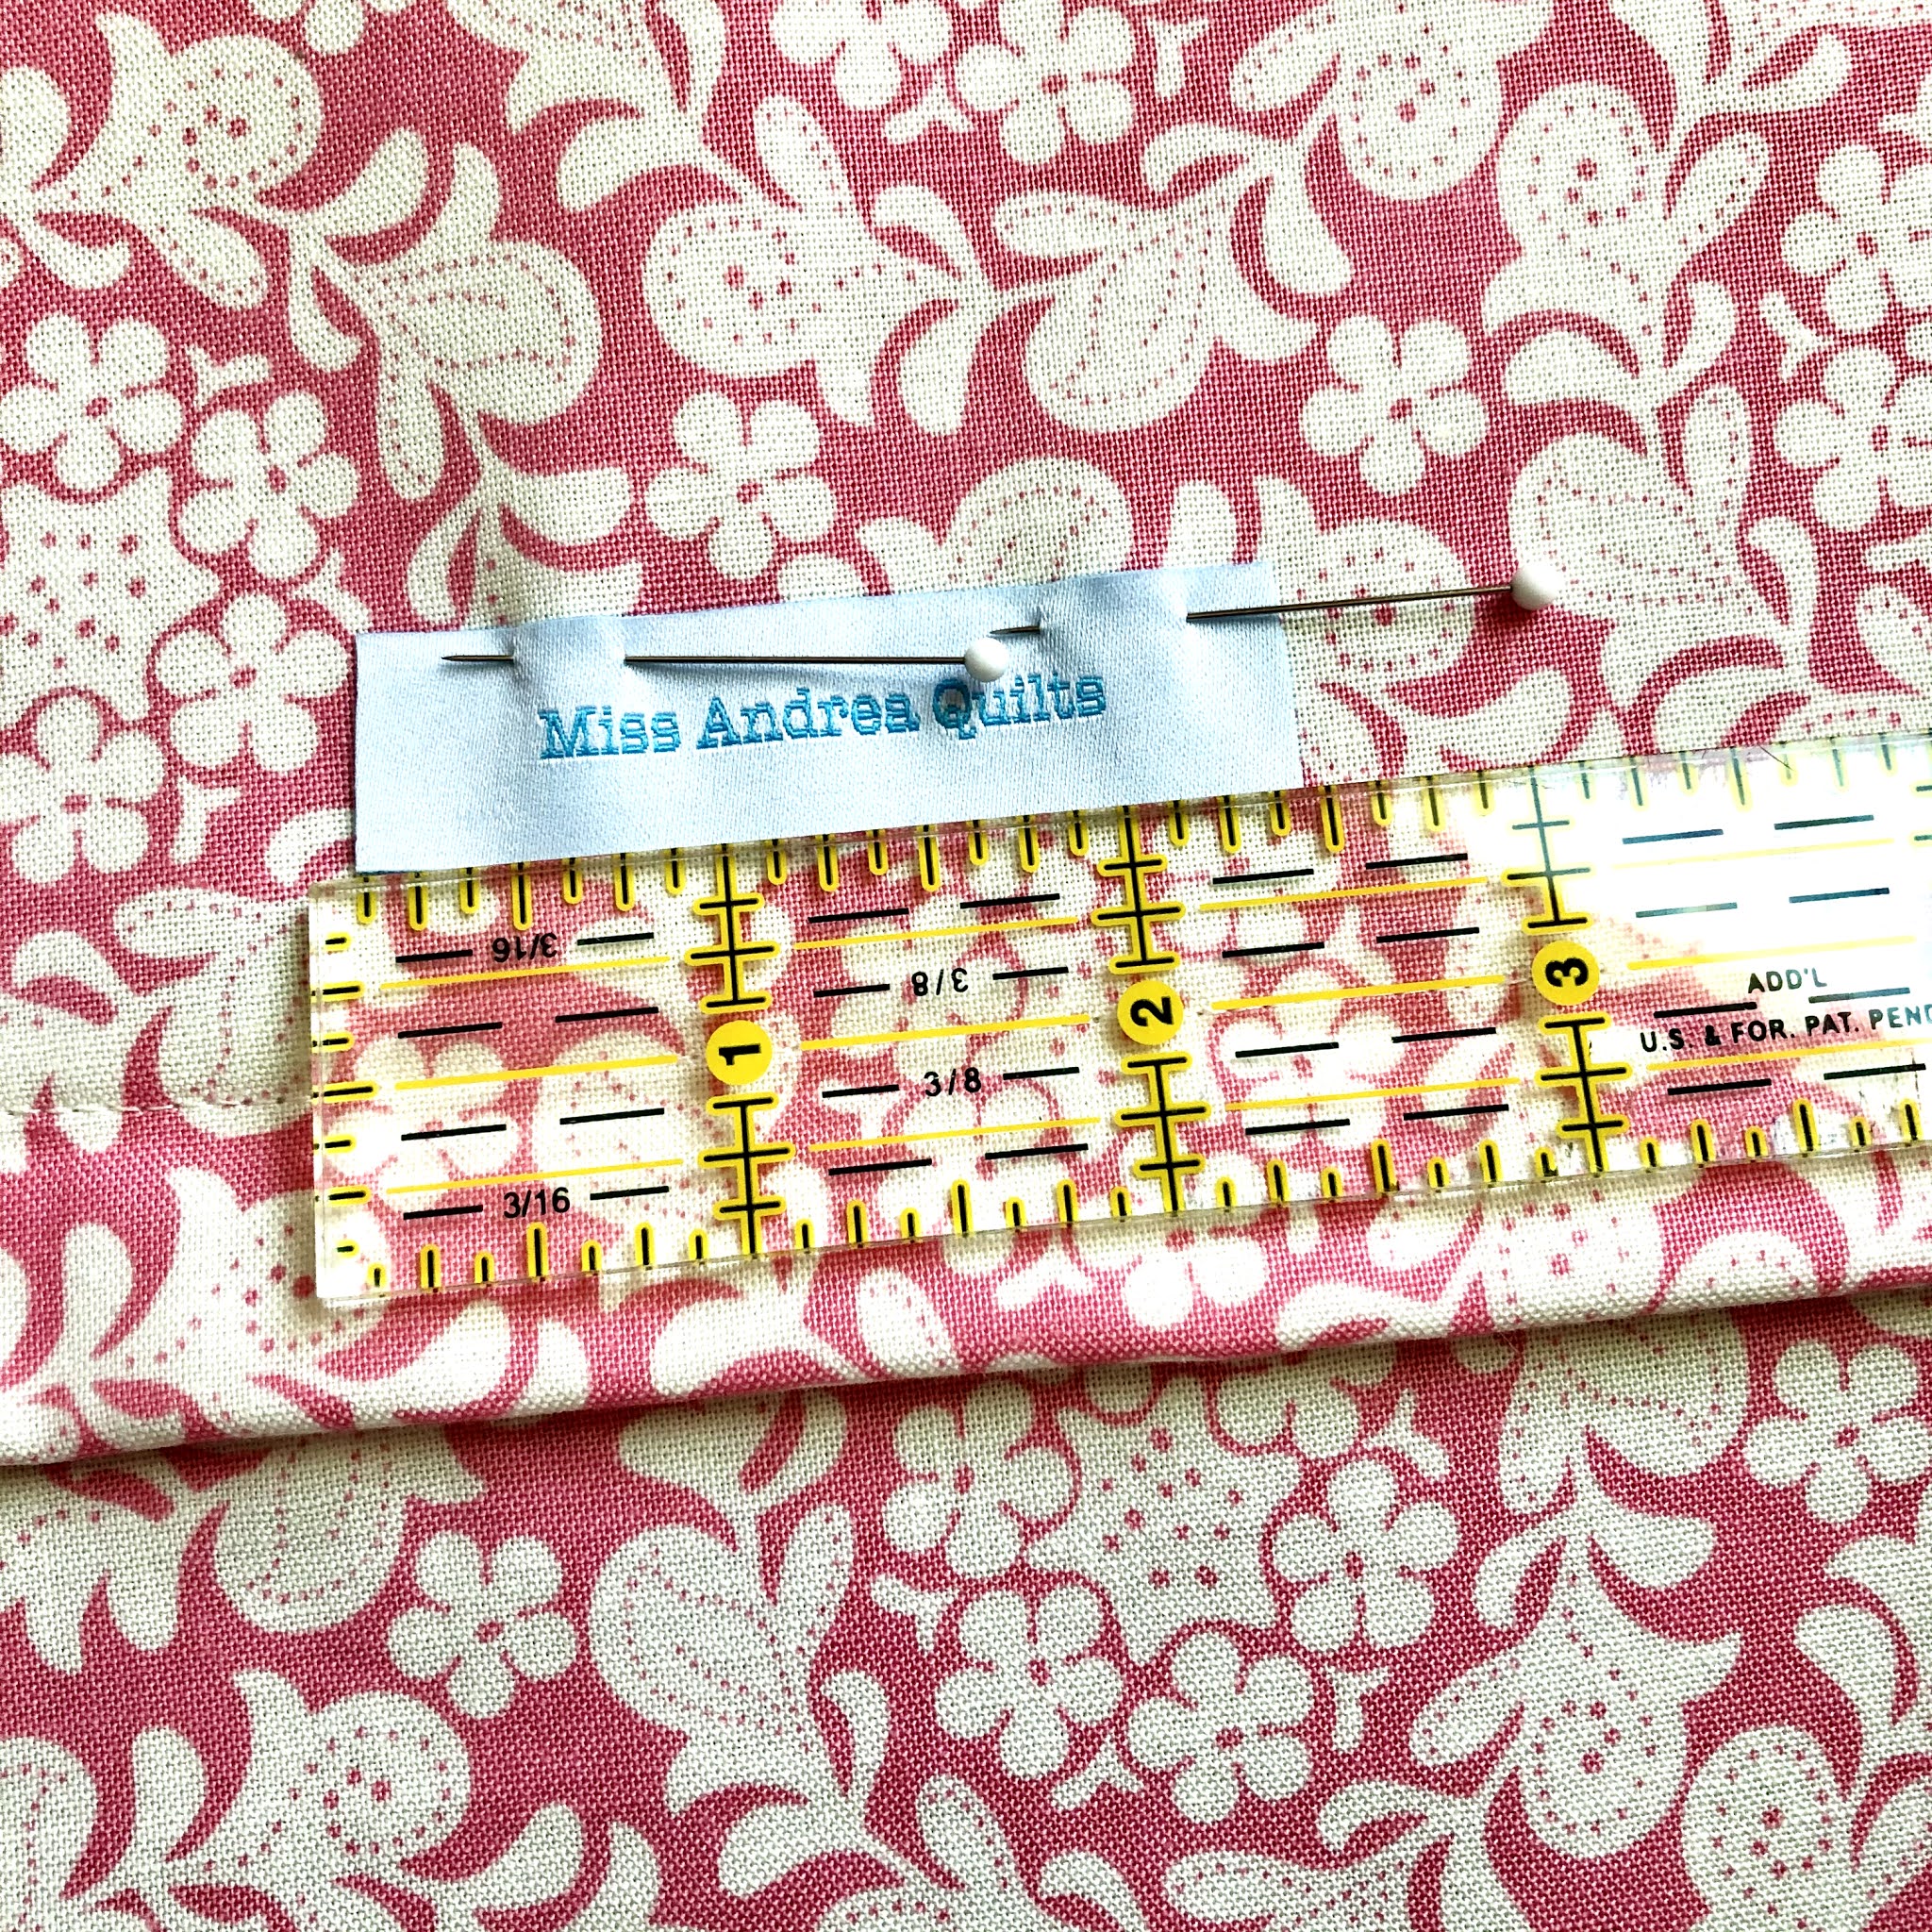
Topstitch by lining the right edge of the patchwork foot along the zipper teeth, as shown in the photo above,
Look at the lovely topstitch that results!
Slide zipper tab in,
and stitch across each end of zipper closure...
... to prevent accidentally sliding the zipper tab off the teeth.
You want to avoid doing that at all costs!!
If you want to add a label, be sure to stitch it on now.
I love adding my labels to anything and everything I stitch! I get mine from
Dutch Label Shop. They are really reasonable and have tons of options.
Now you can lay your back next to your top and slide it up and down to decide where you would like to place the closure. The excess fabric length gives you that option no matter what size pillow you are stitching.
I forgot to take a picture of the next step, but place wrong sides together, centering the pillow top side to side and positioning the zipper closure where you would like; pin.
Stitch 1/8" from the pillow top edge along all four sides.
You may want to use a walking foot or dual feed instead of your 1/4" patchwork foot at this point to prevent shifting.
Trim the excess backing fabric and zipper ends even with the pillow top.
I have a separate rotary cutter I use for trimming zippers so that I don't dull the blade.
Now it's time to stitch the binding!
(If you are skipping the binding, then open up the zipper, place right sides together, stitch a 1/4" - 1/2" seam, and turn right side out.
Viola, you're done!)
Binding
Stitch binding to the front using a walking foot or dual feed and a 1/4" seam.
Wrap binding around to the back and glue baste in place with Roxanne's Glue-Baste-It, just covering the machine stitching line. Use a dry iron to heat set and speed up the drying time.
This is the secret to perfectly topstitched binding!
Top stitch from the front. I usually move my needle over to the left 2-3 notches when using my walking foot to make it easier to stitch close to the edge. If you were precise with your glue basting, your stitching will look just as good on the back as it does on the front!
Congratulations, you did it!! Insert a pillow form and admire your creation! :)
Be sure to use a pillow form that is the same size or slightly larger so that you don't end up with a wimpy, unstuffed pillow.
If your pillow top isn't a standard size,
this handout will walk you through how to make a custom pillow form.
I usually cut my binding strips 2-1/4" for quilts, but I prefer 2" for pillows and mini wall hangings.
Also, I always hand stitch the binding on my quilts, but I like the look of topstitched binding for pillows.
Care to climb down the pillow-making hole with me?! I can't stop making pillows....
:)