Friday, January 29, 2016

In Memory of a Mother


Jessica's mom passed away unexpectedly a year ago this month.  She asked me to do something with her shirts in remembrance of her.  There were just enough t-shirts to make a small t-shirt quilt, similar to the ones I just completed for Abby and Carolyn.


I added this label to the back of the quilt to commemorate her mom.  I simply scanned the bookmark from the funeral, then printed it onto Kona Cotton with my ink jet printer.  In order for the fabric to feed through the printer properly, I trimmed a piece of freezer paper to 8 1/2 x 11", ironed it onto the cotton fabric, then trimmed the fabric to the size of the paper.  It worked like a charm!  (Probably helped that I finally broke down and got a new printer that feeds more easily!)  I then heat set it with a dry iron for about 30 seconds.

I found the flannel backing fabric and binding fabric in my stash - the colors were perfect, and the flannel makes for a comforting quilt.


I plan to upcycle the rest of her shirts into a few infinity scarves and pillows.  I'll do a similar label on them as well.

Jessica, I hope this quilt helps to keep your mom's memories fresh and alive in your heart!

Isn't She Amazing!


My dear friend Kathy O. of Stitch by Stitch sent me this fabulous stitch-out to me today.  


I asked her to stitch some samples of all her amazing work so that I could study them up close and hopefully implant some of her talent into the muscle memory of my brain.

She was so generous - look at all the stitching samples she created for me!


This note says it all....

Thank you, my dear friend!


Thursday, January 28, 2016

Abby's T-shirt Quilt


I also stitched a T-shirt quilt for Carolyn's younger sister Abby!


The sizes of the blocks in Abby's collection of t-shirts didn't lend themselves to Too Cool T-shirt method, so I simply cut them into 16" blocks and cut the smaller motifs into sizes that could be pieced into a 16" block.


Again, a personalized label adds the final touch!


Carolyn's T-shirt Quilt


I've been wanting to make a T-shirt quilt based on the method outlined in this book for a long time, especially after seeing the quilt my friend Cindy made for her son's graduation.  When Carolyn's mom asked me to make a quilt for her out of her extensive collection of t-shirts, I knew the time had come!


I love the look of this style of t-shirt quilt, but it does take plenty of t-shirts with motifs in a variety of sizes.


The process of graphing out the various size blocks and laying them out in a puzzle format is a bit time consuming, but so worth it.  It's actually a lot of fun!  And, it was really fun stitching all those partial seams - definitely not boring.  


The book walks you through each step, including the partial seams; it was much easier than I anticipated.


This method allows you to use blocks of all different sizes, which adds so much interest to the quilt.


A personalized label adds the final touch!
(I printed the label onto Kona Cotton with my ink jet printer, then heat set it with a dry iron, just like Jessica's label.)  To prevent the backing fabric from showing through the label fabric, I lined it with a layer of the Kona cotton, fusing the edges of the lining to the label.  It was a bit tedious and fiddly, but I'm glad I took the time to do it, especially with all the fine printing on the label.


Thanks, Laurie, for allowing me to shoot these photos at my beloved yoga Studio, Vital Tree Yoga.
(Indoor photo shoots are warranted these days by all the snow that is happening outside our doors!)


*Note:  While I did follow the method outlined in the Too Cool T-shirt Quilt Book for laying out the blocks, I did not follow her recommendation to not use fusible interfacing.  I have always found that a very light weight fusible interfacing applied with the stretch of the interfacing going vertically against the t-shirt makes a world of difference in stabilizing the blocks.  I went with the cheapest, lightest-weight interfacing I could find, and that did the trick!

Wednesday, January 27, 2016

My First Metro Rings!


I finally worked up the courage to tackle a Metro Rings quilt!  
(I took the picture indoors, as it will be quite a while 'til outdoor pictures are feasible again thanks to last week's blizzard!)  


I certainly wouldn't have attempted this pattern by now, but it was custom piecing job requested by one of Kathy O.'s customers.  Needless to say, I dragged my feet on this one since it was a totally new concept/process.


The key tool is this Quick Curve Ruler.  It allows you to make a quilt similar in style to the traditional Double Wedding Ring pattern, but without the tedious cutting and piecing of the small wedge pieces.  The QCR allows your to strip piece, then slice the curves with the ruler. Even so, it still takes a bit of time to piece one of these beauties!

I must say, I went from "I will never, ever make one of these quilts again" to "I need to make one for myself now!"   (I have a Jelly Roll of Jen Kingwell's Gardenvale fabric that will be perfect for mine!)  The piecing is a bit tricky.  And, I had a terrible time getting my blocks to lay flat until I steamed and starched them heavily.  (I didn't think to take pictures of the before and after.)  I'm still now sure why; I'm pretty sure my piecing was accurate.  The grain line ended up distorted as a result, but you don't notice it in the final product.  When all is said and done, it's pretty impressive how everything turns out!

Some tips:
This video was helpful in explaining how to position your hands when stitching the curved pieces.  Be sure to take care when lining up the ruler; if you line everything up correctly, your triangles should match perfectly.  And, make sure you have plenty of starch on hand before you get started!

You can purchase the Quick Curve Ruler here and the Metro Rings pattern here.


This quilt was custom made for some professional cowboy hat makers - how fun is that?!  The red and block center triangles are right on!  Kathy and her friend picked out fabrics that were perfect for the cowboy theme:


Can't wait to see what magic Kathy works with her long arm stitching!


Chic Country (PDF Pattern)


PS - Now I want to make this quilt with the QC Ruler!!
You can order the Chic Country pattern here.

Half-Square Triangle Love


I needed to add an additional $.42 to my recent Amazon purchase in order to qualify for free shipping, so look what ended up in my cart as a result!  The blizzard delayed its arrival until today, but that's OK.  :)

I love Jeni Baker - she's so cute, and I love her approach to quilting.

You can order her book here.
And, check out her blog here.


Saturday, January 9, 2016

A Stab at Machine Binding


I do not like the look of machine-stitched binding!  Never have!  I know a lot of quilters rave about how much time it saves, but I still don't like the look of it.  However, as I was finishing up two T-shirt quilts for a customer, I felt that I should consider machine binding the quilts to save me some time and save my customer some money.  

I contemplated how I wanted to go about it.  I do not like the look of the "stitch-in-the-ditch" method.  The problem with that method is that it is almost impossible to stitch neatly in the ditch on the front AND consistently catch the binding on the back.  I don't even like the look of "stitching in the ditch" when it comes to machine quilting.  As one quilter eloquently stated, "it ends up being stitching in the vicinity of the stitch, not the ditch!"  And, it's not always possible to find a thread color that won't be noticeable from the front since there are likely so many different fabrics used in a quilt.

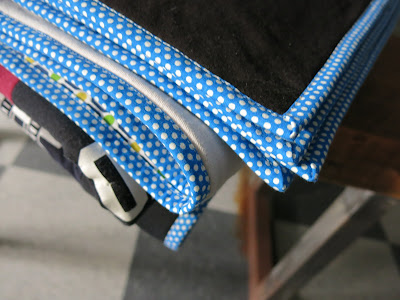
But, I do like the look of topstitching.  And for a casual quilt like a T-shirt quilt, it actually looks appropriate.  So, I stitched the binding to the front of the quilt, wrapped it around to the back, used basting glue to hold everything securely in place, then topstitched from the front.  That way, the front looks great, and the back is pretty darn good, although not perfect.

Some tips:


Zig zag all the way around the quilt before attaching the binding.  That will keep all your raw edges nice and flat, which makes glue basting so much easier.


A washable glue with a fine tip is best. I really like Roxanne's Glue-Baste-It glue, with, but it's my understanding that Elmer's Washable School Glue works well too.  I really love Roxanne's for applique, and a little goes a long way.


Glue baste small sections, then give it a quick press with a steam iron to help the glue to dry quickly and eliminate any shifting.


The front ends up looking great!


The back can look pretty good if you're careful about the gluing process - even the corners!

It's definitely a time saver, and with some more practice I think I can get the back to look as good as the front.  I may have to consider doing it more often in the future!


Wednesday, January 6, 2016

Westwood Acres New Year's Sale


Honestly, really, truly - I have been trying not to buy any more fabric!  I have enough fabric to keep me busy for the rest of my days.  And, I often worry that my fabric stash will not be respected when I'm dead and gone - that whoever is stuck cleaning out my house will simply pass judgement on me for still having unused fabric on the day of my death.

But, I could not resist Westwood Acre's New Year's Day sale!  Their prices are already so reasonable, and when they dangled the 35% off sale in front of me, my resolve disappeared.  I'm glad it did, because I LOVE what I purchased:


This lovely fat eighth bundle of Lecien's Flower Sugar fabrics.  I've been collecting them for my Farmer's Wife quilt.


This fabulous "Type" FQ bundle.


This sweet Windemere jelly roll.  I kept eyeing it at my favorite local quilt shop, but couldn't justify buying it until now.


And this dear, dear, dear Vintage Market panel by Tasha Noel.  I so wanted to buy a fat quarter bundle of the entire line last fall when it was released, but I resisted, and now I kind of regret it....


OK, I need to get away from the keyboard and head to the sewing room!  :)


Tuesday, January 5, 2016

Liz's Lovely Quilt


I had the lovely privilege of machine quilting this quilt for a customer.  


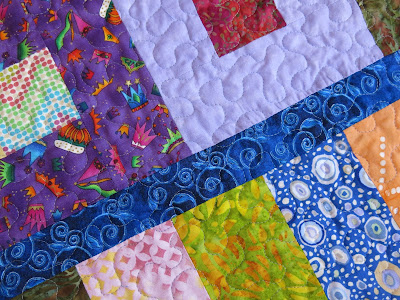
All it needed was a simple stipple so the fabrics and pattern could take the main stage.


Love it, Liz!!

Stats:
58x88"
Batting:  Warm & White
Thread:  Aurifil 50 wt, color #2610